Tuesday, November 1, 2011

Thinking Outside the Rusty Box: Part 2 – Success with a Twist

Back in June of this year (2011), I started evaluating the chelation rust removal process as part of my ongoing restoration efforts on my Boss 302.  Though I entered the experiment as a skeptic, I now have a new-found appreciation for this technology.

I started my evaluation of chelation by making the decision to only evaluate the apparent top-of-the-line products marketed directly to the automotive market as a concentrate.  My reasoning was simple:  Why pay good money to ship a solution of 80% water when I could mix it myself for less?  I stand by this position and maintain that this is the only practical approach to incorporating chelation rust removal effectively and affordably on a larger scale for the hobby automotive or motorcycle restorer. 

In my previous installment, I purposely left out the name of the original product I evaluated until I had a chance to evaluate a second competitive product and report the results. After careful consideration, I have decided to reveal BOTH products with the caveat that I do not exclusively endorse either one.  They have very similar performance characteristics but at the same time, they have their idiosyncrasies as well.  I will try to identify these further as I go. For reference, in each test, I purchased 2 one-gallon jugs of concentrate for evaluation.

The first product I tested is marketed by a company called Ultra One Corporation in Hackettstown, NJ and goes by the name of Ultra One Safest Rust Remover.  Safest Rust Remover is available in one-gallon concentrate (and premix) in gallons jugs and 55-gallon drums.  Please reference my original chelation test here for more information on the Ultra One Safest Rust Remover concentrate:


The second product I tested, and featured in this installment, is marketed by a company called Rust Depot in Horseheads, NY and goes by the name of Esprit Performance Rust Remover.   Esprit Performance Rust Remover is available as a concentrate only in quantities from 16 ounce bottles to 55-gallon drums.

The Esprit Performance product is also mixed at 4:1 (4 parts distilled water to 1 part concentrate) just like the Ultra One, but it has the distinction of being clear and colorless in the jug, where the Ultra One was pee-yellow.  Esprit also touts their product as having an added “metal cleaner” in the mix to help remove light oils, grease and dirt.  This, in my opinion, is not much of an attraction since I believe you should start with a cleaned surface.

Application of the Esprit product is the same as the Ultra One with either constant spray/cascade or complete immersion.  Since the spray application was the method of choice for me, I used the same equipment I used in my first test to apply the Esprit solution, but I did drop a few pieces into the solution just so I could see how effective the immersion technique would be.  I targeted the inner rear quarter panel of my Boss for this test since the rust in this area was about equivalent to the roof rust I removed with the Ultra One, so I felt I had as close to an apples-to-apples comparison as I could get.

One change I attempted to make was to heat the chelant with a 1500W engine heater plumbed in a constant bypass loop right off the circulation pump.  This would allow me to regulate peak flow at the sprayer by simply diverting any excess flow through the heater circuit and back into the tank, similar to a modern returnless fuel system.  This makes for a much easier job for the pump (no dead-heading) and still allows for simple plumbing to the heater.  The result:  FAIL!  Didn’t work worth snot and proved to be a total waste of time for several reasons.  Most influential was the slow thermal transfer of the heater to the fluid and the rapid heat loss of the fluid to the air as a function of spraying (atomizing) and wetting a rather large, cool surface with a thin layer of fluid.  In short, I need to look at an immersion-type heater to make this work.  Another trip to Tractor Supply…….

Because the scale of the project was considerably smaller than the roof treatment, I was able to use a small cement mixing pan as my containment pan and a fan head garden sprayer for delivery.  Having learned my lesson about fluid loss based on my earlier trials, I elevated the pan on a quartet of plastic 5-gallon buckets to minimize splash and keep everything closer to the work area. 

Satisfied that everything was secure and ready to work, I set the process in motion and adjusted the spray head to provide the maximum coverage possible without spraying expensive chelant all over creation.  After a few short hours, the results were quite impressive.  Rust was definitely being removed but I started to notice a few new characteristics I had not seen with the Ultra One product.  First, all of the plastic, rubber and vinyl parts and some of the painted parts that come into contact with the Esprit chelant develop a glossy, slightly sticky surface. 

Also, over time, the edges of the wetted areas develop a copper-like residue just outside of the grey/black film that develops as part of the process.  I am pretty sure this is a byproduct of the metallic ions leeched off of the brass/bronze valve & hose fittings I use in the plumbing scheme.  No big deal as it scrubs off rather easily with scotch brite pads, but interesting nonetheless.

I am happy to say the Esprit Performance Rust Remover works well.  I admit that it worked a fair bit slower than my June test of the Ultra One product, but this is mostly attributed to the fact that the chelant is forced to operate at about 70°F at this time of year in my shop given that my heating approach failed to function as intended.  A clear lesson I have learned is that rust removal time (a.k.a. chelant effectiveness) is drastically improved with increases in temperature, with my defacto target temperature being about 120°F.  Even though both product suppliers indicate the chelant can be heated to a higher working temp, I think the benefits vs. risks of going any higher than 120°F are such that it makes no practical sense to aspire to a higher temperature target.

So, with the test results from both the Safest Rust Remover and Esprit Performance Rust Remover in hand, what’s the verdict?  Actually, the answer is a bit complicated. 

1.     First and foremost, BOTH products work as advertised.  I remain absolutely convinced that the ONLY way to purchase chelant for any project that will require a volume exceeding ½ gallon is in concentrated form.  As such, this tends to steer a consumer to one of these two suppliers based on my experience and research. 

2.    Unfortunately, the specter of cost forges the point of my biggest complaint between the two suppliers.  The absolute straight skinny on cost is that Ultra One commands a comparative “King’s Ransom” for their gallon of concentrate at $100 US/gallon!  Rust Depot, on the other hand, commands “only” $62.50 US/gallon for what is functionally the same product.  Add the usual shipping premium that most any carrier applies and you are not talking about insignificant differences in cost.  Ouch!

3.    Performance of both products is quite good.  Equivalent for the most part, in fact.  The chelation process doesn’t give a crap at how nasty the rust is that it is being asked to remove.  As long as you keep delivering viable (e.g., non-saturated) chelant to the rusted surface, this stuff keeps eating it until there is absolutely no rust left.  All this without damaging the parent metal.  Think of chelation as “targeted rust removal”.  A “smart bomb” for rust, if you will.  In my experience, the speed of rust removal is directly proportional to temperature and I need to come up with a much better method of heating the chelant.  As development in this area continues, I will document it here.

4.    Both products react rather aggressively to leaded body filler and galvanized metals (particularly zinc I think).  This makes perfect sense as I think about what chelants are designed to do from a medical perspective.  They capture metallic ions in the blood and allow them to be excreted from the body.  Our old Mustangs use genuine lead body filler at the top of the A and C pillars where the roof seams are located.  As such, the chelant eats rather heavily into this material as it goes about removing surrounding rust.  Generally, this isn’t a big deal, but beware the effect this may have on the used chelant solution and how you treat and dispose of it.  Neither supplier had ever heard of or experienced this phenomenon so I was on my own.

5.    Customer service is one of those things that mean different things to different people.  I absolute abhor crappy customer service and I am of the opinion that the advent of the “internet-based” business has allowed the degradation in customer service to accelerate at an unnatural rate.  Fortunately, both suppliers proved somewhat available for questions and both suppliers were very familiar with the hands-on application of their product.  But without being too pointed, I spent less and got more.  I’ll leave it at that.

6.    Clean-up after treatment is one place where I found the two products diverged significantly.  As I mentioned before, the Esprit Performance remover left all non-metallic parts with a slightly sticky, glossy residue and areas where chelant was allowed to run and dry required a bit of scrubbing to get clean.  I did not experience either of these conditions with the Ultra One product and I expect this may be due to base formulation differences, like the addition of the detergents in the Esprit formulation.  For me, I would just as soon see Esprit do away with the detergents and lower the cost even more…..at which point their product would be a double-tough act to follow.

In summary, I am sold on the process.  However, I am convinced there is plenty of room to improve the application of chelation to the automotive restoration process.  Fortunately, I have several ideas I plan to test and report on this blog in the hope that my fellow restoration hobbyists can benefit.  Also, I have found one more chelation product that may just prove to be the silver bullet for most adventurous enthusiasts that want to try the chelation process for rust removal but either can’t or don’t want to invest in the equipment to spray and recover liquid chelant.  Also, I have a request (by a group of individuals, NOT a manufacturer) to review one of the most popular premixed, commercially available chelation solutions as well.  So there’s plenty more to come.
Here is my attempt at heating the chelant.  I used an inverted 1500W engine heater setup in bypass right out of the pump.  Looked nice and clean and worked for CRAP!  I'll have to come up with something else.....
 
Chelant is in the catch basin and the system is ready to go.  Note how clear the fluid is in the beginning.

With the flow regulated by the amount of fluid I allow to bypass through the heater, I set the spray head to cover the rusted area as completely as possible.

I managed to capture the bulk of the overflow quite successfully using this simple concrete mixing pan.  The foaming you see here is a result of the returned fluid agitation as it splashes into the recovery basin.  Within an hour, the chelant starts to take on the distinctive "rusty water" color seen here.


The next series of photos are intended to show the progression of the rust removal process over time.  The total spray time from start to finish is approximately 10 hours.


Rear Marker Light Filling

One of the subtle body modifications I have planned it to fill the corner marker lights at the front and rear.  So, with a few hours on my hands, I decided to dive into the project on the left rear quarter.
Because good fit is essential when filling in large voids in body sheet metal, the first thing I did was to make a very accurate template by taping thin cardboard (I like to use old cereal boxes) to the outside of the fender directly over the marker light hole and carefully tracing the opening.
Next, I cut the template just inside of the trace lines to provide a slight amount of kerf to the part when it came time to cut it out.  From there, I applied machinist’s dye to a piece of clean 22 gauge sheet steel and, after it dried, I scribed the pattern onto the metal.  Then it was off to the band saw to rough out the panel and then, with a combination of files and a belt sander, I carefully trimmed the profile to fit just inside the marker light hole in the body.  After a few slight tweaks, the panel fit nicely and it was ready for installation.
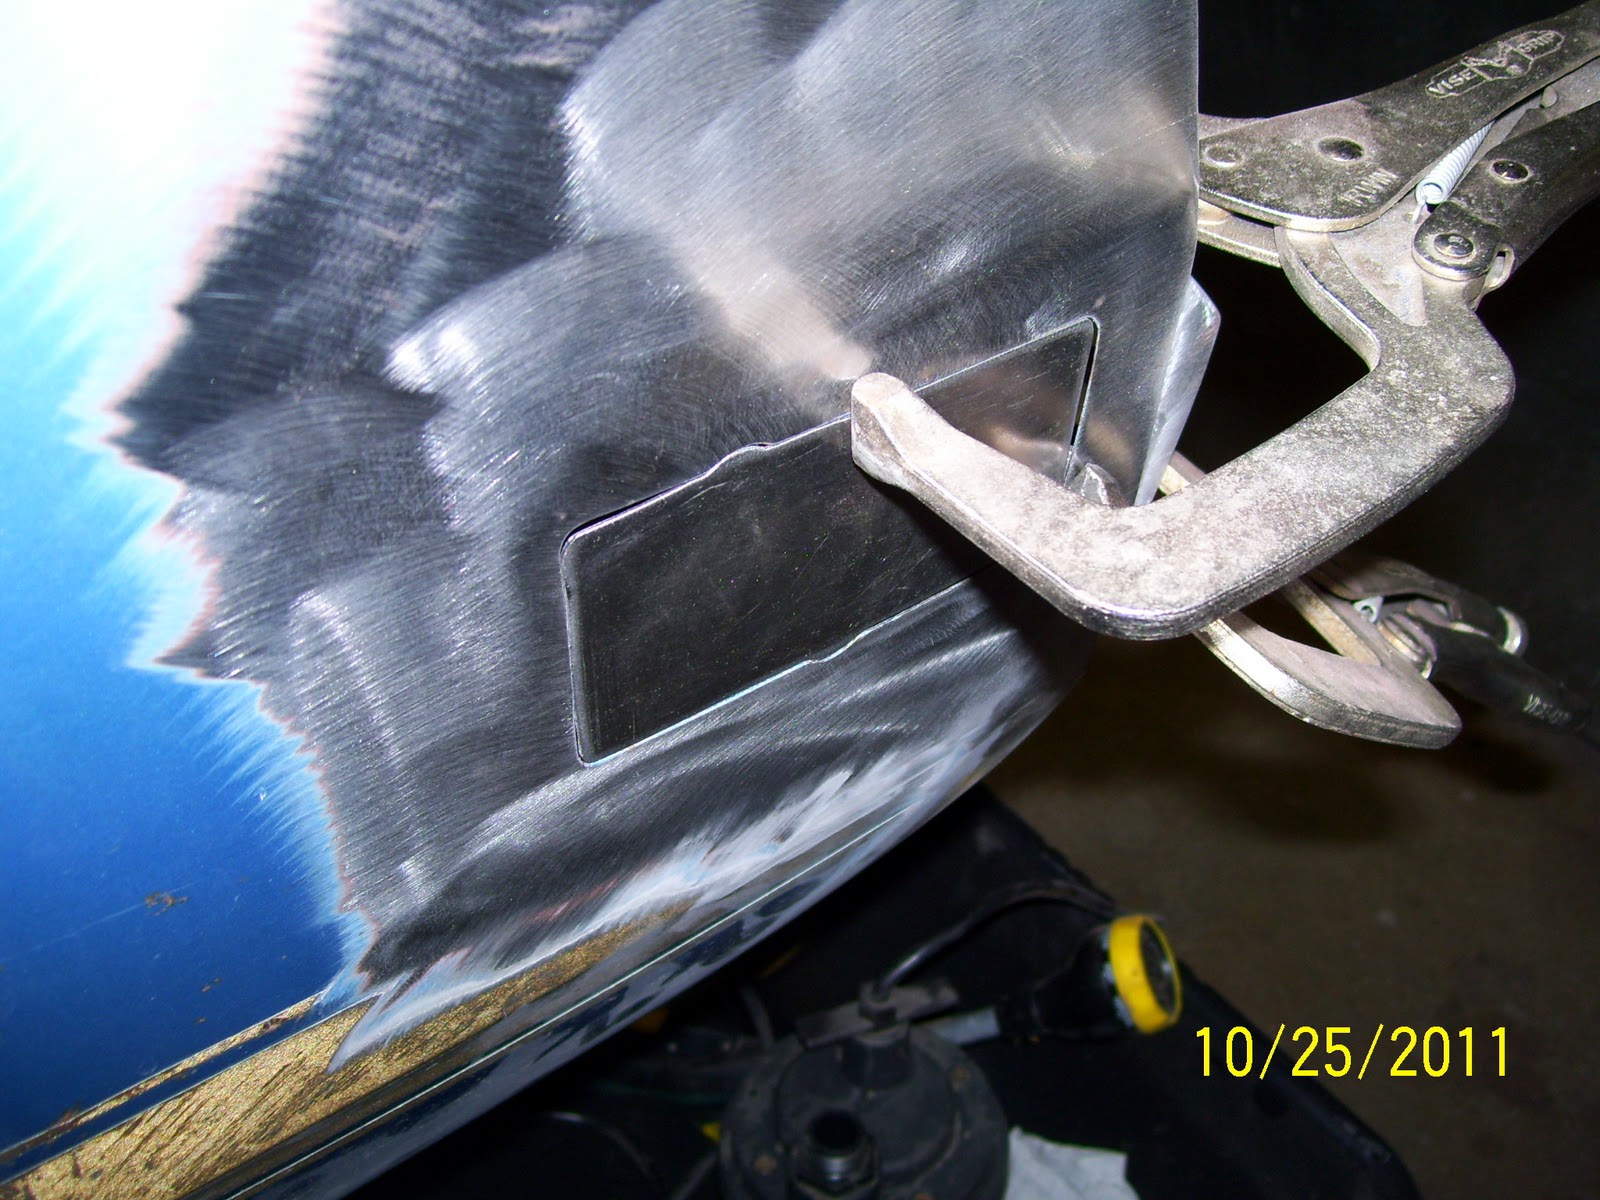
Using my adjustable welding clamps, I clamped the filler panel into place and tack welded the perimeter in several places, cooling each tack with a healthy blast of compressed air to minimize warping.  Then I ground these tacks smooth to allow me to make sure the panel fit correctly before final welding.  With everything fitting well, I simply walked around the panel randomly and began “connecting the dots” with several tacks, cooling each one as I went.  With the welding complete, I smoothed the welds with my angle grinder and finished the area with a course nylon surface conditioning disk.  A thin skim of filler over this area and there should be no evidence the modification was ever made.  One side done, one to go!

Pattern material taped over the marker light hole for tracing.

With the pattern blank taped tightly to the body, I can easily trace the opening from inside the car without worrying that the pattern will shift.

With the trace complete, it's simply a matter of carefully trimming the template just to the inside of the lines.

The template is then traced on to a piece of 22 gauge sheet steel and then cut out and finished so the panel is slightly smaller than the opening.

Using my trusty welding clamps, I clamped the panel in place and made sure the alignment was just right.

I tacked the panel at several locations, cooling each one with compressed air.  As I worked my way around the panel, I moved the welding clamp along to make sure the fit was consistent all the way around the panel.

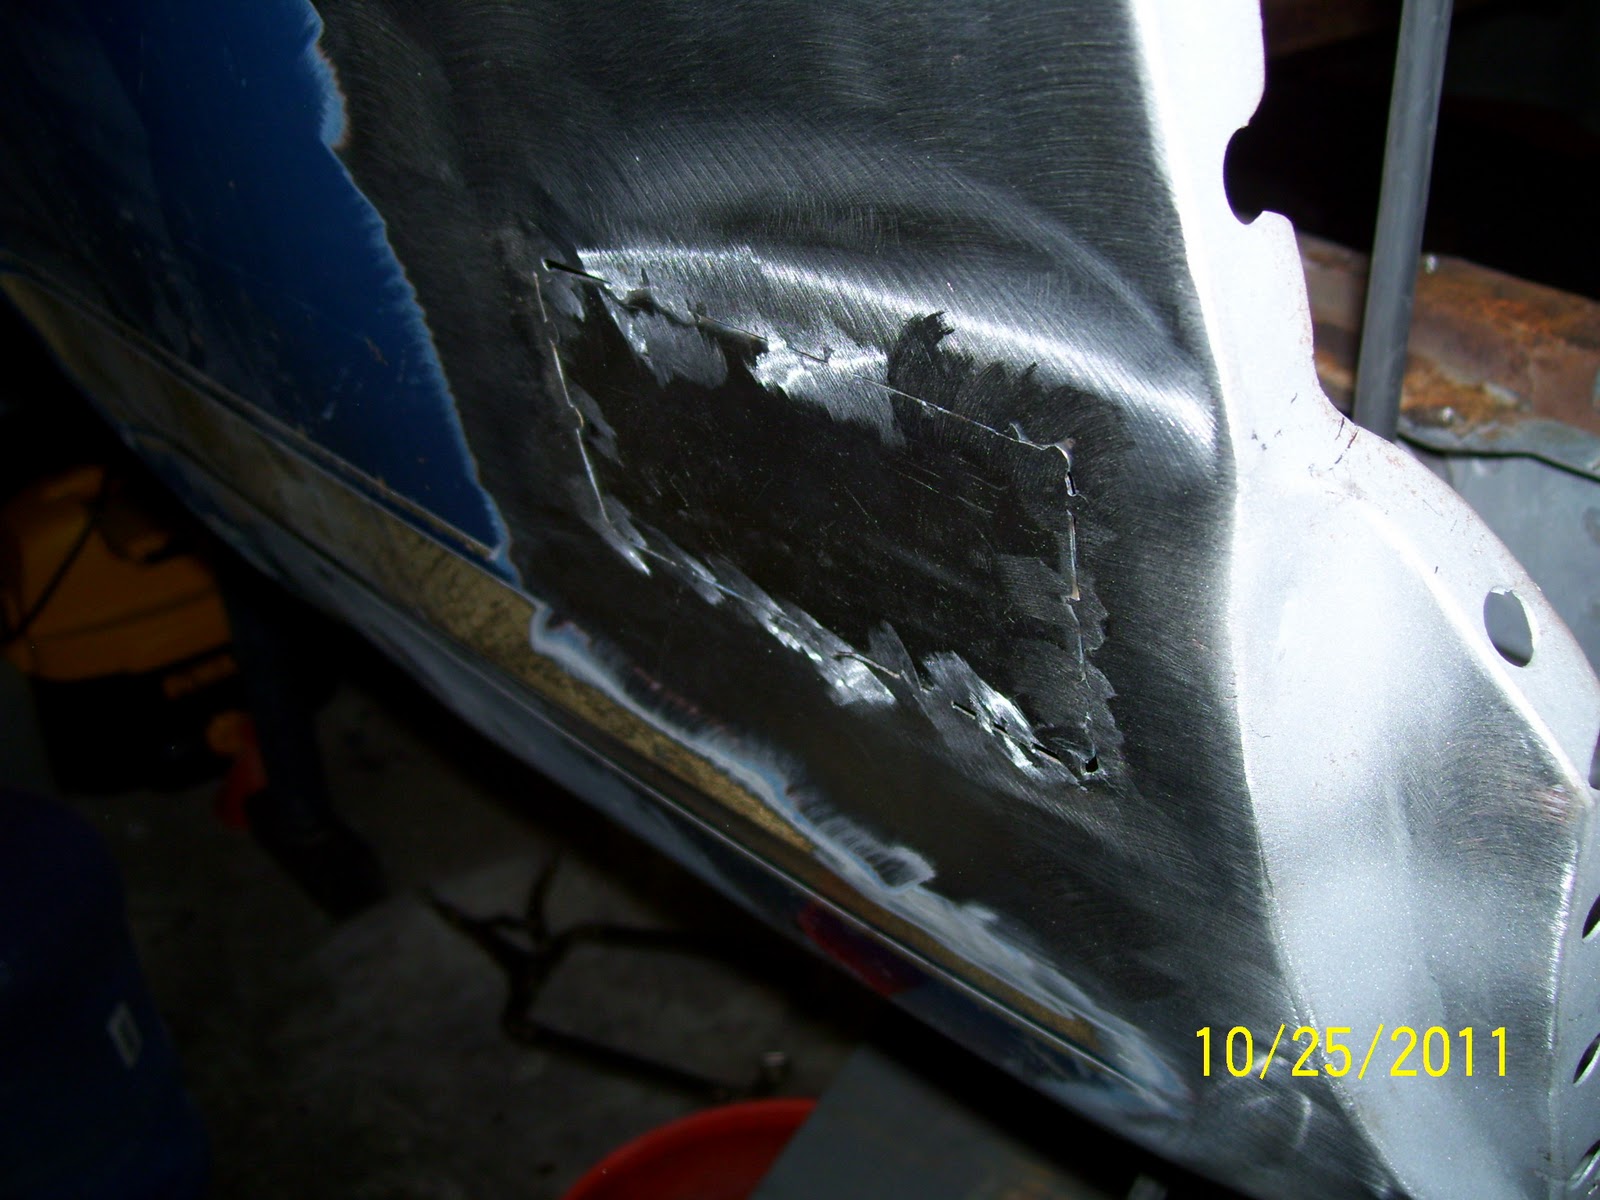
I ground the first spot weld flush to make sure the fit was what I wanted.  With everything looking right, I welded the panel in fully and ground the welds smooth.

After a trio around the area with a surface conditioning disk, the panel is barely visible.  After a skim of filler, it should be completely undetectable.

A look from the inside after a little clean-up.

Tuesday, October 18, 2011

Tail Light Panel and Trunk Floor – Part 2

Well……as much as I whine about sand blasting, I can’t deny its unmatched usefulness in auto restoration.  So, while the weather continued to offer opportunity to do so, I put on my “big-boy pants” and set to it once again to properly clean the flange areas of rust scale and better evaluate the wheel opening corners and inner wheel housings.  I already knew I was in for a repair on the right side rear wheel opening, but as I soon discovered, the left side would not escape the same fate.  Looks like the scope of work between the left and right side of the car will be a virtual match.  Whoopee………

The “up” side to this discovery is that I had already prepared for most of this additional repair, so all I need is one more patch panel to cover this newly discovered damage.  As a bonus, I can purchase one single patch panel that will cover the left rear wheel opening corner patch as well as the curb damage on the front wheel opening (more on this in a future entry).

With clean(ish) metal to work with, I leveled the car on the chassis support posts and started marking all of the spot welds locations on the left trunk floor in preparation for removal.  This is where a bit of pre-planning helped quite a lot, as all of the spot welds are not easily accessible with the spot weld cutter.  Also, a secret to making the job go much easier was to cut away as much of the old panels as possible such that I was left with only the spot welded flanges to work with.  I chose to use my pneumatic sheet metal nibbler for this as it is quick and capable of maneuvering in tight spaces much easier than my air saw.

With the bulk of the left trunk floor panel out of the way, I cut the spot welds free and popped the panels out rather easily.  The two areas that require a different approach are the welds along the inner wheel house and along the lower quarter edge between the wheel opening and the rear valence area.  In the inner wheel house area, I marked and drilled the welds from inside the wheel opening and gently separated the panels with a thin putty knife.  On the lower quarter flange, I found I couldn’t approach the welds straight-on with my spot weld cutter due to interference with my rotisserie, so I sized things up and decided to carefully grind through each spot weld with my cutoff wheel so I could pop the flange loose without running the risk of drilling a hole through this rather narrow flange.

It’s worth noting that all of the welded flanges in this area of a Mustang have weld-thru seam sealer between them and this provides significant resistance to separation of the flanges even after the welds are cut.  Another caveat is that you can be absolutely sure that anywhere Ford put this weld-thru seam sealer between the flanges is now quite rusty.  There’s absolutely no escaping this fact and it’s one of those dirty little secrets that nobody wants to let out of the bag and unless you plan to completely disassemble every last welded seam in the car, this is something you simply must deal with.  This is one area that has me thinking a chelation “dip process” could be very effective.  But that’s another story altogether……..

With the left trunk floor out of the way, I removed the rear trunk floor flange with rather unceremonious application of my trusty Sawzall which allowed me to remove the small section of flange left attached to the rear subframe horn.  With all of the offending sheet metal now removed from the left side, I was delighted to find the left rear subframe rail in pristine condition!  If ever there was an automotive “miracle” this discovery just might be it.  For as much weather that this car has endured, and the state of the trunk floor in general, the fact that the subframe is in such good condition almost defies explanation.  Thank goodness for galvanized metal!  Here’s hoping the right side is just as good.

In the meantime, I will start grinding the spot weld buttons smooth, metal working the flanges flat and starting the quarter and outer wheel opening rust repairs.  I have also found a number of additional stress cracks and valence bolt hole damage that requires repair as well, so the next few weeks will be pretty full.
Though it's tough to tell in this photo, I have started by marking all of the spot welds that need to be cut to remove this trunk floor section.

Here is a view of the rusty mess and you can see some buckling evidence of the rear punt the car took sometime in it's life.  I have already scraped off the sprayed undercoating that lined a section of the inner fender in this shot.

The right side looks a tiny bit better, but this is the side where the rust has eaten through the outer skin at the rear of the wheel house.

After slapping myself around a bit, I sucked it up and rolled the car out to the drive for some sand blasting mayhem.  In the end, it was the best decision.

Looking back up from the trunk floor to the top of the left rear quarter, you can see there was absolutely no pant or primer on the majority of these surfaces.  We're gunna fix that soon!

I love my dad!  Always there to help and always an ace at everything he does!  He's the reason this job got done before dark!  As you can see, he plays the Sandman quite well!

Have I mentioned that stinkin sand gets EVERYWHERE?

After a short blast from the inside, you can clearly see the rust perforation in the right rear quarter.  No surprise.

I didn't blast everything totally spotless as I plan to do another chelation experiment very soon on the inner quarters.

I rather like this view.  It really looks like I'm getting somewhere.  Nice clean, solid metal in beautiful grey primer.  And then.......

.......ya get this by stepping back a few paces.  Quite a contrast and probably the best indicator of what the current job entails.  Once it's done, she should be nice and solid again!

SURPRISE!  After the first several spot welds were cut and the floor pulled back, I couldn't believe how nice the inner frame rails were!  However, I quickly found that cutting away the extra material with my nibbler made removal of the panel much easier.

How about that!?  No problem at all working with these rails!  Hopefully the right side will be equally good!


With the bulk of the metal removed before I started drilling out spot welds, it was relatively easy to get the welded sections out.  Here, the entire left trunk floor is removed.

Note that every place there was a spot welded seam (except on the galvanized rail flanges), the factory weld-thru seam sealer has promoted rust between the panels.  One of the "dirty little secrets" of classic Mustang restoration.

The last section I removed was the rear trunk floor cross panel that spans the full width of the trunk from apron to apron.  Again, I cut out the bulk of material with my trusty Sawzall and left only the spot welded section to remove.

Here is a good shot showing the way I support the rear frame rails in the rotisserie as well as the small section of material that remains to be removed from the rear subframe horn.

Here is the head-on shot of the rear of the subframe with all of the rusty metal cut away.  Nice!

And there we have it.  A pile of rusty crap that used to be a left trunk floor.

Saturday, October 1, 2011

Tail Light Panel and Trunk Floor – Part 1

The last major structural repairs that must be completed on my Boss 302 before “regular” restoration work can commence involve replacement of the trunk floors, rear tail light panel, rear quarter extensions and repair of the front trunk floor/axle tunnel flanges along with a small amount of rust repair on the right rear wheel arch.
It sounds so simple to condense it down that way, but this amount of work is quite extensive and will take a few months to complete, if not longer.  In fact, as the pace of restoration work has slowed over the last few weeks with non-Boss related activities, the chances are that this particular project will continue deep into the winter before it is complete…….so let’s get started!

At one point, before my ownership, this car was the “meat” in a traffic accident sandwich and suffered light damage to the rear and somewhat heavier damage to the front sheet metal.  Luckily, the rear quarters were not buckled in the incident, but the tail light panel, and rear center trunk floor and lower valence were folded noticeably and the temporary repairs were very poorly executed.  The end result was rust invasion between every panel such that the only way for me to repair them was total panel replacement.
I spent several weeks studying the landscape of this repair, carefully mapping out every step I would take in making sure the end result would be well-fitting, straight and pristine sheet metal.  Once I was comfortable with where I was going, and the repair panels were in hand, I was off to the races.

One significant change to my plans was actually a welcome reduction in the scope of work I had envisioned.  The lower rear section of the right quarter panel was where the rust repairs were required.  Originally, I planned to install a complete patch panel along the entire lower rear quarter panel section, however on closer examination, I discovered I had a lot of good metal around the area and the repair could be condensed to a small patched area instead.  This leaves the vast majority of the original quarter panel completely intact which is a bonus by almost any definition.  The one caveat to this repair is that it will have to be done while I have the right side trunk floor out to allow proper access to the back side of the repair areas.  No biggie, just planning.
With a solid plan in place, I pulled out my trusty red paint pen and set off marking the cut lines that would allow me to efficiently remove the bulk of damaged sheet metal in the shortest time.  Next, I squared and leveled the chassis on the rotisserie and placed my jacking posts under each rear torque box to maintain this position and to provide substantial support to the chassis while the repairs were being made.

Using a white paint pen, I started marking the spot weld locations that would need to be drilled to allow the fender extensions and inner jack mount, spare tire mount and rear bumper brackets to be removed.  Then out came the “screaming wheel of death” and the sparks started to fly!  After about a half hour and three cutoff blades, I had the tail light panel out of the car.
With room to work, I could now drill the spot welds and remove the jack and spare tire mounts, both rear bumper brackets and both rear fender extensions with relatively little trouble.  This also allowed me plenty of room to scrape the little bit of remaining undercoating off the inner rear quarter panels to make all future work even easier as well as provide a nice smooth surface for Dynamat adhesion when the finish work begins.

I cleaned up and straightened the fender extension flanges with a little angle grinder work and some hammer and dolly taps and began fitting the fender extensions using the factory body locating holes in each quarter panel flange.  I was pleasantly surprised at how well the fender extensions fit (for a change) and I like the one-piece design of the new panels over the rust prone 2-piece design of the original extensions.  Of course, restoration purists will throw up all over this idea, but from a practical perspective, the idea is a good one and I am glad for it in my case.
I spent quite a bit of time making sure the fit of the new quarter extensions was as good as it could be and clamped them in place just as if they were being installed.  Then I carefully marked each spot weld location so I could remove the e-coat only where the welds would be needed.  Did I mention you can never have enough good vise-grip style welding c-clamps?

And that’s where we are.  The next phase will be to remove the trunk floors and start preparing the flanges for the new parts.  In there somewhere, I will start the process of fixing the front trunk floor section as well.  All in all, there will be a lot of tack welded and Cleco’d pieces put in place before the repair work can be finalized.  Off I go!
Front trunk floor/axle tunnel is pretty rough.  Rectangular hole in the upper left is the area cut out by the factory for the staggered shock mount.  I will be repairing this section with new metal and eliminating this hole as it is not required with the rear suspension I am using.

Right side trunk floor is a mess even with the jack and spare tire mounts already removed.  You can just barely make out the buckling at the very rear edges of the panel from a previous bump.

Left side trunk floor is pretty rusty and wrinkled as well.

Using my red paint pen, I marked the locations where I would cut the tail light panel and quarter extensions with my cutoff wheel.  Here is the left extension marked for cutting.

Right side fender extension with cut line marked.

Right rear corner cut line.

Left rear corner cut line.  Some of the wavy sheet metal is visible here.

The white freckles in this shot are spot weld locations marked with white paint pen.

More spot welds located.
Spare tire bracket and jack brackets removed.

A few minutes with a cutoff wheel and the rear tail light panel was out!
With a little metal work, the rear quarter extension flanges were nice and straight.  This allowed me to fit the extension panels quite nicely.

Quarter panel extensions are aligned using the body alignment holes.  These are the three larger holes in the flange that are used when mounting the extension end caps.

As fitting comes closer to perfect, several clamps are required to prevent movement when working on specific areas.  You can never have enough vise-grip type welding clamps.

Right side extension was fit in the same way as the left.

This is a good shot of the fit I am always trying to achieve.  When spot welded in place, this panel will fit every bit as well as the factory parts.
Lower on the outer edges, the fit is equally good.

This is probably one of the trickiest areas to fit on the rear extensions.  Patience and clamping helps as you work the flanges to get the fit as tight as possible.