Wednesday, August 7, 2013

An Export walks into a Monte Carlo Bar…….and Gets Gassed!

On any given day, this tag-line could be true, but for the past few weeks, it pretty much sums up the variety of work that has been completed on the Night Mission Boss 302 project as we soldier on toward getting the car off the rotisserie and on a body cart in preparation for the Fall and Winter workload.  A lot of small and not-so-small tasks absorbed the past few weeks and the results were, once again, a reward in every capacity.

The Street or Track Billet Export Brace with a Night Mission Twist
The journey begins with the installation of the exceptionally nice billet export brace kit from Street or Track.  As I have come to expect from Shaun @ Street or Track, this kit was top-shelf stuff with only minor fitting required on the firewall bulkhead brace (which Shaun and I discussed beforehand).  Outside of that, the pieces fit perfectly.

Once the installation of the export brace kit was verified, I set about designing and building new shock tower mounting plates that would serve a dual purpose and solve an issue I had with the style of the plates included in the kit.  It is worth noting that the mounting plates included in the kit are perfectly adequate for “normal” installations, but I have concerns over the conventional method of divorcing the mounting functions of the export brace and the Monte Carlo bar and determined that I would need to fabricate my own mounting plates to satisfy all of the demands I had imposed on the design.
The first design goal I wanted to address was to integrate the export brace and Monte Carlo bar outboard mounting features into a single, solid mounting point at the top of each shock tower.  This is where the forces of the suspension converge at the top and, in my mind, it only made sense to combine the mounting locations at this critical point. 

Secondly, the top of the shock tower is a MUCH stronger structure than the commonly implemented fender apron mounts of just about 99.9% of the commercial Monte Carlo bars out there.  A fender apron mounting scheme also forces the Monte Carlo bar to be much lower in the engine bay, making distributor clearance a constantly annoying dilemma that is, more often than not, addressed by putting a huge bend in the bar which does absolutely terrible things to the stiffness of the bar itself.
And finally, since the car would have no need to allow for provisions for upper shock mounts to protrude above the shock tower, I wanted the upper shock tower mounting plates to have no holes in them for this purpose.

So, after carefully measuring and photographing a few complete 69-70 Mustangs for reference and several nights sketching designs and making paper patterns for mock-up, I established a simple and very strong integrated mounting plate that would satisfy every design element I required and look good in the process.
Once I made a wooden test piece to check fit, I ordered fresh 6061-T6 aluminum stock and dedicated a few hours of band saw, milling machine and belt sander time to fab up the new mounts.  Once they were complete, they fit absolutely perfectly and I could then take careful measurements that would allow me to have a custom swaged aluminum Monte Carlo brace made that would match the export brace links perfectly and provide the lateral stiffness I expected from the assembly.  The end result solves all of the design and functional concerns I had in a simple, and somewhat elegant solution.

Lokar Billet “Direct-Fit” Gas Pedal
Lokar products are another line that I have been very impressed and satisfied with and I was keen to use their new “Midnight” series billet pedals in the car to add just a bit more style to this otherwise rather unsightly area of classic Mustangs and to improve the ultimate performance and operational smoothness of the gas pedal and throttle cable setup.

Lokar’s direct-fit gas pedal is a very nice piece of engineering that is fully adjustable and fits in the stock pedal location.  This makes installation a breeze with the only modification being the need to drill a 5/16” hole for the new throttle cable location.  In fact, the installation is so simple there is nothing really interesting to include in this write-up, so I will let the pictures and captions do the rest.  Of course, there will be more follow-up on the entire Lokar pedal upgrade in a future entry as we get a bit closer to tackling that work.
Front and Rear Suspension Parts are Finally Powder Coated

The final spate of work that needed doing was to get all of the raw steel parts of the front and rear suspension as well as the modified Unisteer rack and pinion steering mounting bracket in powder coat.  The batch of parts was fairly large so Ted and I dedicated several hours over the course of a few evenings to getting everything cleaned and prepared for powder; followed by another few evenings spent applying the powder and curing everything to our satisfaction. 
I am very fortunate to have full professional powder coating capability in my home shop as part of my “other” interests in the custom motorcycle, bicycle and automotive realms, which makes the entire powder coating process much more affordable and approachable than it would be otherwise.

Using my favorite urethane matte black powder, I was able to get all of the pieces looking absolutely beautiful.  Once finished, Ted and I assembled the hardware back onto the components and even had the opportunity to install the rear upper coilover mounting bracket in place.  The look of the smooth matte black finish against the Raptor bed liner material we sprayed on the bottom of the car a few weeks back looks absolutely unbelievable and gives a nice hint on how the bottom of the car will look in finished form.
Next on the agenda, Ted and I will complete mapping the inner fender aprons and firewall to allow us to begin the long and tedious process of filling the many unnecessary holes in these surfaces.  While I don’t want the under hood panels to appear “fake” or overdone, I do want the surfaces to be smooth and uninterrupted while maintaining a simple factory “look”.  I’ll keep my fingers crossed that we can pull it off.

The Street or Track billet export brace kit is a wonderful piece that fits the car perfectly.  Here is the substantial firewall bulkhead mount that really ties the upper and lower cowl together and provides a solid foundation for the forward braces that support the shock towers.  Top notch stuff!


A unique feature of the Street or track export brace kit are these two mounting bolts that tie the cowl securely to the flange mounting plane.  This adds tremendous stiffness to this mounting location and does not rely solely on the cowl flange for support.

This is the upper mounting plate as supplied in the Street or Track export brace kit.  For 99% of the applications, this plate is a perfect solution, but as with many aspects of the night Mission boss 302, it needed a few tweaks to satisfy all of the design requirements.

A few different paper patterns were made based on the intended design and trial fit to the assembly to evaluate the end result.  This pattern ended up satisfying all of the design goals in one rather simple solution.

The front view of the pattern shows how the Monte Carlo bar mounting location would be positioned on the plate and how it cleanly integrates into the core structure of the mount.  Also not that the shock mount clearance hole in the middle of the original plate has been eliminated.
Another look at the mount pattern shows how this configuration will allow the Monte Carlo bar to be mounted either above or below the mount for distributor clearance.

A few hours of fab work applied to a fresh piece of 3/8" 6061-T6 aluminum resulted in a pair of upper mounting plates that serve dual;-duty as the export brace and Monte Carlo bar mounts and look nice in the process.

First trial fit of the Street or track export brace kit with the new mounts shows they fit perfectly.  So far, so good!

Trial fit of the custom Monte Carlo bar shows perfect fit at this location as well.


A top view of the passenger side shock tower mount shows how cleanly the forward braces of the export brace and the Monte Carlo brace converge at the mounting plate.

Here is a look at the driver side assembly all buttoned up.

The passenger side view of the assembly is equally satisfying.


And there it is in finished form.  The Street or Track export brace has been integrated with a custom fabricated Monte Carlo bar via the specially designed shock tower mounts.  (Night) mission accomplished!

Lokar offers this impressive and wonderfully well made direct-fit gas pedal kit for the 69-70 Mustang.  While this will most likely disappear under the dash area when the car is complete, the look is miles ahead of the stock pedal and the action is buttery smooth.  Plush, it looks pretty kick-ass too!

From the engine bay, these two button head screws are all you see that give away the Lokar custom pedal.
 
A shot of the Lokar pedal from the passenger side.

We finally were able to catch up on a lot of the powder coating work on the many raw metal parts we had in the front suspension, rear suspension and rack and pinion steering system.  Here are the power steering mounting bracket for the Unisteer R&P conversion and the modified upper rear coilover mount with freshly applied powder just before going into the oven to cure.

Still hot from the powder coating oven, the brackets look great!
 
Up close, you can get a really good idea how beautiful the matte black urethane powder flows out over the part.


This is the rear upper coilover mount installed in place after powder coating.  While the flash makes the Raptor bed liner material look glossier than it really is, the smooth and elegant look is clear to see with the bar mounted in place.

Another look at the mounting saddle for the upper rear coilover mount.

A better look at the whole rear bar installed in place.  The matte black powder coated finish is the perfect compliment to the Raptor bed liner finish under the car.

After all of the hardware was reinstalled on the front and rear suspension components, the batch of parts looks ready for business.  Love it!

Monday, July 15, 2013

Finishing the Exterior Floor: Raptor Spray Bed Liner from U-POL

We’ve been on a bit of a hiatus over the past few weeks as a remodel of a bedroom took precedence over just about everything.  I think my return to the shop was actually as much a relief to my family as myself as I get rather irritable with thinks like painting walls, installing flooring, assembling furniture, hanging pictures and other nefarious crap like that.  But once I got back to my beloved project, I was just about as excited as a puppy and darn near rolled over and peed all over myself!  Yep……it was good to get back in the shop……

As milestones go, the work that Ted and I were set to accomplish was significant.  Finishing the bottom of the car would represent the first “finish work” we would do since the project began and it’s been a LONG time coming.  We would finally get a chance to see what all of the tedious detail work we had toiled over for the past several months would look like when the final finish was applied and we could stand back and see first-hand if what we had imagined in our minds’ eye would be reflected in reality.  It was “go” time and we were ready…..
Almost from the beginning of the project, I decided that I wanted the bottom of the car to have a very smooth and integrated look, while still maintaining exceptional durability, ease of maintenance and subtle “stealth” that would not give away its many secrets so easily.  The looks I wanted was achievable by using spray bed liner material and is the “secret” that countless pro-built rods have used over the past few years.  As trick as the finish looks, it is one of the easiest finishes to apply that you will ever experience.  Now, we are not talking about the roll-on coatings or the spray-can variety.  Indeed, there are many less-than-desirable DIY bed liner coatings out there.  However, the products that actually work are the catalyzed urethane products that are applied with a Schutz gun.

After many weeks of research, I settled on a product called Raptor Liner from U-POL.  I was fortunate enough to talk to local industry experts that use massive amounts of the stuff and confirm their results by researching the same product on the internet forums.  I was very impressed with the virtually 100% satisfaction rating of the product in both professional and hobbyist hands.  Again, it was a matter of following the directions to the letter and the results would come.

 
The process began by spending lots of time carefully masking all of the previously scuff-sanded surfaces, the areas that needed protection from over spray, and establishing the clean edges we needed everywhere else.  This is not the time to get in a hurry or be careless with your work as it will be reflected directly in the finished product.  So, Ted and I spent several evenings making sure all of our masking was complete and all holes were plugged.  Then…….we waited.

The weather had been pretty hit-and-miss the past few weeks with fairly frequent rain and that wasn’t going to work on a product that would need to be sprayed outside.  Alternatively, the summer temperatures have started to creep up into the higher 80’s and the humidity has been up there as well and neither of these conditions was ideal for spraying the Raptor Liner material according to the directions.  After about a week of careful weather-watching, we saw our window and the weather couldn’t have been more perfect.  So, we rolled the car outside and let the fun begin!
Like any coating application, the first step was to lightly swab the surfaces with wax and grease remover and then blow off any dust with compressed air.  Then, one more careful inspection of the masking and plugs to make sure we hadn’t lost anything and we were ready to apply the Raptor Liner.

The instructions were about as simple as it could be in that the catalyst was added to each bottle then shaken for 2 minutes and then applied with the special Schutz-type spray gun supplied in the kit.  However, before turning the gun loose on the car, I decided to test the spray pattern and texture on a piece of old sheet metal to make absolutely sure I would get the results I was looking for.  The final setting on the air pressure was a “triggered” 45psi at the gun and that is where the regulator was locked down for the entire process.
I began spraying the floor at the back of the car and moved forward, keeping the spray distance at about 15-18 inches from the surface.  I concentrated on the most difficult and intricate areas of the floor first to make absolutely sure I would get all of the nooks and crannies covered well and then moved to the open, flatter areas.  Each bottle took about 7-10 minutes to spray and we found that things were really moving at a very quick clip.  In about 30 minutes, the first coat was on and we allowed the entire coating to flash off for the required 60 minutes before returning for the second coat.  This also gave us plenty of time to look over the entire job and identify any areas that would need extra attention to ensure the coating was even and complete from front to back and to clean up the gun with acetone so we would be ready to roll for the second coat.  It is also worth noting that this was yet another time where the rotisserie proved an invaluable tool in ensuring that this type of work could be done at a professional level as it allowed the body to be carefully positioned to ensure complete coverage of every area.

After the flash time had elapsed, we applied a second coat in the same fashion as the first and made sure to cover all of the light or missed areas left over from the first coat.  Again, about 30 minutes was all that was required and the job was done.  Almost immediately after cleaning the gun for the final time, we started removing the masking and plugs to ensure the edges were crisp and the holes clean.  Once this coating dries, it is monstrously tough and would pretty well permanently seal any leftover plugs or masking in its place forever.  By removing the masking while the coating is still somewhat tacky, the edges are left very sharp and clean.  After another hour of flash time, the finish retained a bit more gloss than I expected, but I knew that would dull a bit over the next several days to just the right satin finish I was looking for, so no worries.
With all of the masking removed and plenty of daylight to observe the finished product, we were extremely pleased with how the Raptor Liner material looked and the finish was everything that I had hoped for.  The bottom of the car looks amazingly smooth and uniform; almost as if the entire floor was one smooth stamping.  The 4-link mounts look as if they were there from the factory and all of the sealed seams are absolutely beautiful.  The rear wheel wells are stunningly clean and uniform and will look fantastic when the car is finally finished.  In short, I couldn’t be happier with the outcome and U-POL Raptor Liner is absolutely everything it is touted to be.  Brilliant!

After heavy research, I settled on U-Pol's Raptor Liner 2K urethane spray bed liner kit.  I found a great deal on two kits from TP Tools (one of my favorite restoration tool suppliers) and each kit included the proper Schutz-type application gun.

Several evenings were spent masking everything as carefully and cleanly as possible.  While over spray is rather minimal, anything sloppy here will ruin the job, so we took our time and made doubly sure everything was right.
 
Here is a look at the lower edges of the trunk drop off/quarter panel and the tail light panel fully masked.

The rocker flanges were also m asked along their length.  You can also see we had previously scuffed the PPG DP90LF primer to ensure a good foundation for the Raptor.

Fuel tank aperture is masked to the inside of the opening to allow the Raptor to create a "soft-edge" along the inside flanges which looks nice and is easy to feather.

The rocker flanges and wheel opening lips are carefully masked where the two come together.  This is a rather intricate area that rewards taking your time.

In the center of the photo you can just see the silicone plugs on the e-brake flange and shifter hole flange bolt holes.  Also, this clearly shows the scuffed surface on the DP90LF primer.

The upper coilover mounting bracket sockets are masked, including the oval hole where the fasteners must pass through and seat when tightened.

The firewall transition seam is where the bed liner material would be terminated and again, careful masking was the key to a fine finish.

A quick swabbing with wax and grease remover and the floor was ready to coat!
 
Here is the assembled U-POL spray gun that is designed specifically to fit the Raptor bottles.  I added the red filter ad quick connect fitting to the inlet for good measure.  Air pressure was set at 45psi "triggered" at the gun and this proved to be perfect for the application of the material.

Some may recognize this piece of scrap as the original roof skin off the car.  As it turns out, it made an excellent spray test panel to dial in the gun settings before moving the work to the "real" surfaces.  Glad I hadn't thrown it away just yet!
 
We started at the back and worked out way forward, concentrating on the intricate and hard-to-reach areas before moving to the flatter sections.  After only one coat, you can already see how uniform everything is starting to look and how evenly the Raptor Liner is adhering to the surfaces.

Spray distance was kept at about 15-18" from the surface and the material was applied in even, sweeping motions.  I can't say enough how much of an advantage having the car on a rotisserie was during this phase of work.


Straight out of the gun and still wet, the first coat is done!  Each coat is allowed to flash off for a full 60 minutes before application of the second coat.

During the flash period, we took a close look at every nook and cranny to spot any areas that needed attention during the second coat application.  One area I went light on can be seen here at the front of the transmission floor brace, just to the left of center in this image.  This was easily and quickly addressed when the second coat was applied.

After the second coat, the entire axle tunnel area looked fantastically smooth and tidy.
 
Wheel tubs looked especially good and should be exceptionally durable and easy to maintain.

Even the area where the spare tire bulge was pounded out and smoothed up looked factory fresh with a coating of the Raptor Liner.

Another shot of the completed axle tunnel shows how nicely the final finish looks.  To the untrained eye, even the 4-link suspension modifications take on an integrated, factory-built look.

Another shot of the wheel tubs and 4-link details.

After the masking was removed while the second coat was still tacky, the panhard mount and upper coilover saddle brackets looked very clean.

Rear frame rails and trunk drops are absolutely pristine.

The final finish looks incredible and the entire job took only about 3 hours from the time the car was rolled out of the shop to the time it was rolled back in.  Amazing!

Thursday, June 20, 2013

13” Front Disc Brake Installation: The Right Stuff ...... Detailing that is!

Another solid week of work yields another completed phase of the front suspension and braking system assembly.  This week, we tackled the job of assembling the entire 13” front disc brake system on the freshened drum brake front spindles and hubs and the results were exceptional.  I love working with well-engineered, solid parts that require no fiddling to make fit and/or function.  Luckily, we’re batting a thousand lately!

To begin the latest adventure, we started by cleaning up the drum brake spindles and hubs in preparation for powder coating.  As many Mustang enthusiasts have often painfully discovered, the production Mustang spindles are very roughly machined forgings with lots of raw, sharp edges that are just begging to mutilate human tissue.  At the same time, they don’t look particularly sanitary and as such, became the focus of considerable smoothing with the angle grinder and some 60-grit discs before heading off to the blast cabinet.  After a few minutes of abrasive clean-up, the spindles looked amazing and were set aside for later cleaning before powder.
On the hubs, it was necessary to turn the O.D. of the flanges down a bit in order to properly fit the re-drilled, 13” vented (Brand X) rotors.  As an aside, these rotors have a 0.480” more inboard offset in the hat area over the “Cobra” 13” rotors to allow fitment of a wider selection of wheels without the need to use wheel spacers.  By simply re-drilling the rotors to fit the Ford 5 x 4.5” bolt circle, these rotors are a simple bolt-on choice with a wide variety of feature options in the aftermarket.  We will ultimately upgrade the front rotors at a later date, but all smoke-testing will be done on the standard rotors as shown here.

Once the hub O.D. machining was complete, they received the same abrasive clean-up as the spindles and both pairs of parts were prepped and powder coated in our standard urethane satin black that we use for all of the under-car components.  Once out of the oven, the hubs and spindles looked virtually flawless and we now had a clean foundation to begin the build-up of the assembly.
Assembly of the hubs was begun first by pressing in a full complement of new wheel studs, followed by new bearing races.  Then, each hub and spindle was test fit to seat the bearings as well as verify the fit of the new spindle nut/washer & retention cage before show time.  With the hub and spindle fit verified, we moved on to the fitting of the caliper mounting brackets.

As you may have noted, the spindles and hubs we are using are from a drum brake version of the Mustang and not the original disc brake parts that were originally equipped on the 1970 Boss 302.  There are a few reasons for this that are actually quite simple:  First, the drum brake spindles have a 4-bolt pattern that retains the brake backing plates whereas the disc brake spindles use only three.  The 4-bolt flange makes for a much more stable mounting configuration for the disc brake brackets.  Secondly, the disc brake spindles have a large mounting hole in the spindle upright and an awkward hole/flange grafted onto the steering arm section that are used to mount the production disc brake caliper bracket.  With modern 13” brakes, these holes are not used with this brake combination and historically, these areas of the spindle have proven to be weak points in this design in heavy duty and racing applications.  Besides, disc brake spindles are ugly………so there.
While Street or Track apparently no longer offers the “Cobra” front caliper mounting brackets we use here, they are relatively simple, very high quality devices that install on the 4-bolt backing plate flanges and include the aluminum adapter to properly locate and anchor the production caliper bracket.  In our case, the left and right hand side adapters had to be spaced inboard by .060” on each pad to account for the differences in the production tolerance stack-up to center the caliper brackets over the rotors.  With these details covered, the adapter brackets were torqued to final spec and we were finally able to shift our attention to the final assembly of the hubs.

Since both hubs were already mocked up on the spindles, the assembly process was very simply a matter of cleaning and greasing the wheel bearing cones with bearing grease, installing the wheel seals and sliding them into place on the spindles.  The spindle nuts were installed per the factory shop manual specifications and secured with new retention cages and split keys. 
Now for the REAL excitement!  Our friends at The Right Stuff Detailing (TRSD) have been in the disc brake conversion kit business for a long time and supplied their beautiful, dual piston “Signature Series” PBR calipers in smooth, glass black powder coat finish. 


If you have never heard of The Right Stuff Detailing, take notes.  This is a fantastic company with outstanding products and customer support and their specialty is braking system conversions and components along with custom and pre-bent tubing products, and custom and pre-made e-brake cables and a host of other braking and suspension offerings.

These calipers are a smoother, cleaner version of the classic Cobra/Corvette calipers that have been so popular in the world of classic Mustang disc brake conversions, WITHOUT the gaudy casting “identifiers” tacked all over them or the need to rebuild salvage-yard cores.  Their Signature series calipers are produced to the same exacting OE level specifications as the production model calipers and can be serviced in exactly the same way and with exactly the same parts as the production versions that are now essentially unavailable.
Here again, I am very happy to report that these calipers and brackets bolted on to the spindle assembly with absolutely no drama whatsoever after installation of a fresh set of semi-metallic brake pads.  After all, with OEM-level quality on all the TRSD parts, and standard brake hardware, these calipers don’t know they are, in any way, a part of a custom brake application.

With the TRSD calipers and 13” front rotors solidly in place, we took a step back to admire the beautiful simplicity of the setup.  Almost “elegant’ I would say.  Of course, the visual aspect is enhanced by the sheer size of the rotors and the capability that comes with them.  The Night Mission Boss 302 will STOP with authority to be sure.
As a final measure, the installation of the spindle dust caps presented the next dilemma, and one I had anticipated based on past experience:  Fitting new dust caps WITHOUT beating the snot out of them and/or damaging them during installation such that they look terrible on close inspection.  I absolutely HATE the look of dinged up dust caps on custom cars and would not settle for anything but a clean installation on this project.  I know, I know…..nobody will ever see them, but that is entirely beside the point.  If I know they look terrible, it will eat me alive until I fix it.  So……needing little prodding to dust off my lathe for a project, Ted and I set about making a proper installation tool that would allow the dust caps to be installed in the hubs with minimal effort and absolutely no damage.

Since I already had a nice driver handle that was included in my bearing and seal driver kit, I figured I would make a dust cap driver that would fit that handle for ease of use.  So after a few measurements and a quick design sketch, I scoured the scrap aluminum bin in the shop and popped up with a perfect chunk of extruded 6061 aluminum rod that would work perfectly and require relatively little work to create the tool I needed.
With the South Bend 9” lathe well lubricated and warmed up (ya have to do that on 77-year-old machines), I proceeded to whittle out a driver cup that fit my drive handle perfectly and allowed the dust caps to be driven easily into the hubs with not so much as a scratch on any component.  In fact, the simple tool worked even better than expected and relieved me of the burden of worrying about how my hidden-from-human-eyes dust caps looked.  Another thousand-dollar solution to a ten-cent problem brought to you by your buddies at the Night Mission Boss 302 project!

Anyway, there you have it:  A complete and very capable “big-brake” conversion on the Boss is now in the books.  Soon, we will once again shift back to more “bodywork” type work as we set about spraying the exterior floor pan with Raptor bed liner while the weather is being so cooperative.  Thrown in there will also be a round or two of powder coating front and rear suspension components before we dive back into the engine bay for a host of filling and smoothing operations as we head into the late summer/early fall season.  In between all of that, I have plans to do the Street Rodder Tour from San Antonio, TX to Pigeon Forge, Tennessee with in early September and I am completely fired up about spending a solid week doing nothing but cruising God’s Country in a ’32 Coupe with my uncle.  Truth being what it is, I continue to learn a lot about “smelling the roses” every day.  Until next time!

Close inspection of the stock Mustang spindle will reveal a large number of rough, sharp edges that need smoothing.  We knocked these edges off and spent a good bit of time smoothing all of the other surfaces to make for a nice presentation once in powder coat.
 
After turning down the O.D. of the stock hubs and smoothing and powder coating them, new wheel studs were pressed in.
 
With the new bearing races installed, the hubs were test fit on the spindles to seat the races and make sure there were no surprises in their operation or fit.  You can also just make out the smooth surfaces of the powder coated spindle upright.
 
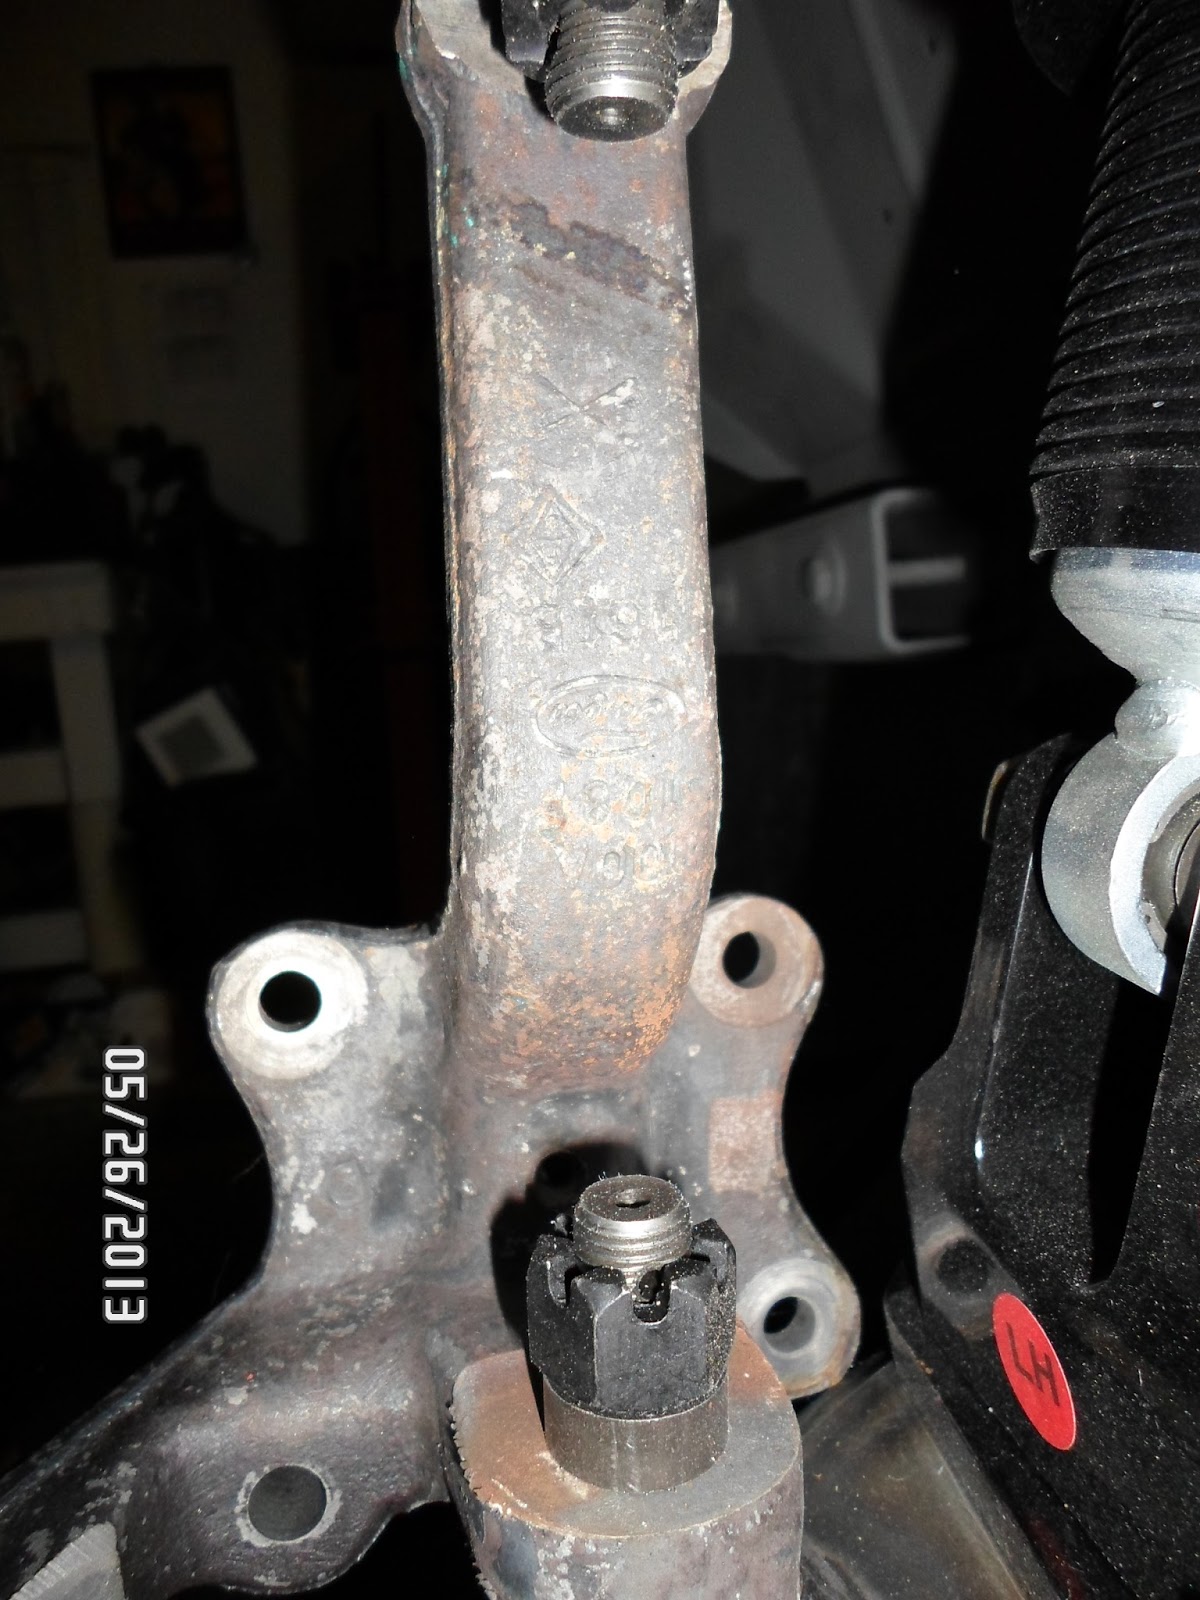
Here, the Street or Track caliper adapter brackets are test fit to the spindle.

The hubs are re-installed to test fit the entire brake system componentry.  Note the hub-centric adapter ring that is now positioned over the center of the hub to locate the rotor properly.

Test fitting the components showed that we needed to install 0.060" shims (see yellow arrow) to account for tolerance stack such that the caliper mounts would center over the rotors properly.
With all adjustments made and fit of all components verified, the adapter brackets were installed permanently with all fasteners torqued to spec with red Loctite where applicable.

Final assembly of the hubs included moly-fortified wheel bearing grease packed into new Timken bearings and buttoned up with new seals.
 
The 13" rotors are an impressive sight bolted to the hubs.  Plenty of braking capability in this package to be sure!

And here is the feature part!  These beautiful Signature series PBR calipers and brackets from The Right Stuff Detailing are as good as they come.  Absolute top quality and OE-level quality and reliability make these calipers extremely hard to beat.  Couple that with a clean, elegant look that is anything but gaudy, and the combination is just about perfect!

Dust cap installation can be a challenge and I particularly hate beat up dust caps on custom cars.  I decided to design and machine a dedicated driver tool that would allow the dust caps to be driven into the hubs squarely with no hint of damage.

The tool is designed to use my bearing driver handle and it worked perfect in driving the dust caps into the hubs perfectly square and undamaged.  Here, the dust cap has already been driven in .

Simple in concept, the driver simply cover the cap and drives it home using the cap flange.

A thing of simple beauty that nobody will likely ever see.  A perfectly undamaged dust cap.  As I said above, a thousand dollar solution to a ten cent problem........I'm sick.

Here are the TRSD calipers and 13" brake rotors in place in all their glory!  I absolutely love the elegant simplicity and absolute purpose this entire assembly displays.  Once all of the bare steel parts are finished in black powder coat, this will be an amazing complement to the project.