Tuesday, January 4, 2011

Cowl Panel Replacement - Episode 2: Fitting, adjusting, more fitting, cleaning, etc.

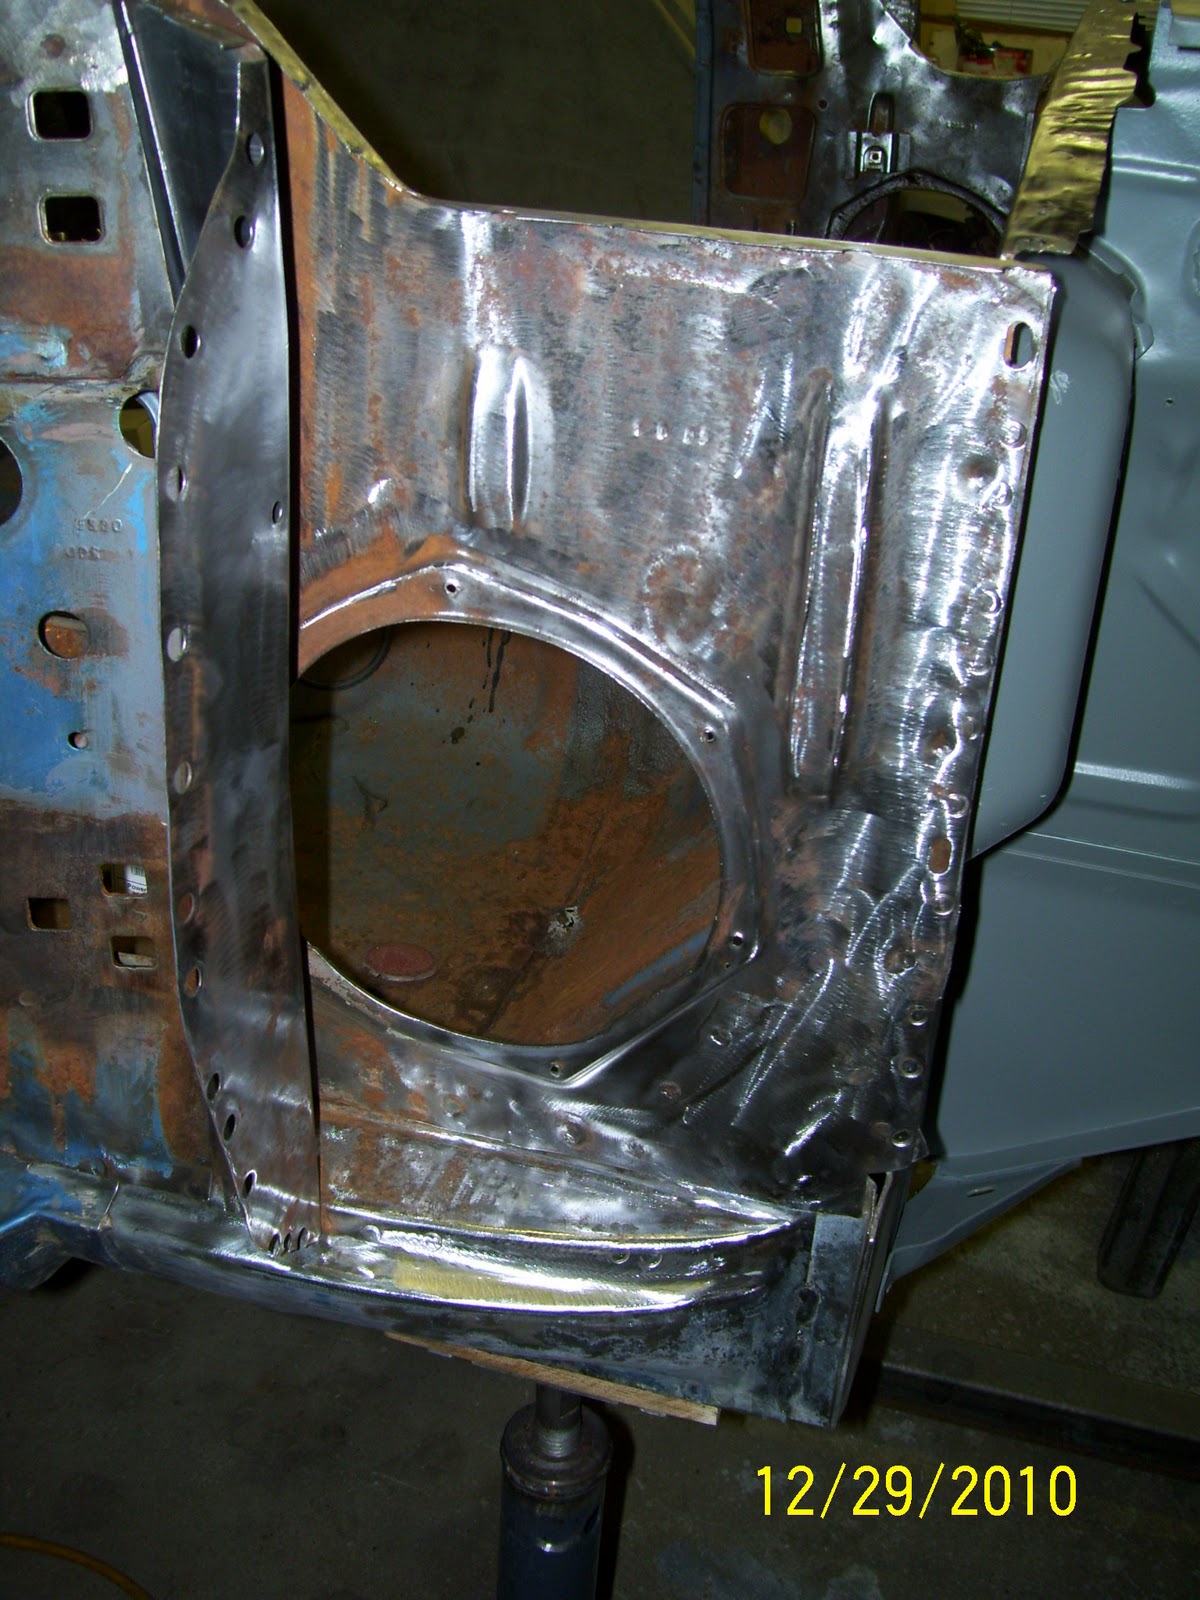
When I last left my work on the cowl, I had made several test fittings and discovered many areas that simply did not fit well.  Most of this was due to the severely deformed saddle flanges that existed once the old cowl was removed.  Evidently, the method of welding the original cowl in the car resulted in the operators’ ability to severely twist the spot weld clamps while the metal was hot, making each spot weld area a real mess.  Most of this irregularity was taken up by the weld through seam sealer, but there were definitely spots that were never sealed properly and this is where most of the heavy damage had centralized.  So, after all my test fitting, I set off to straighten up the saddle flanges such that the new cowl would sit squarely in the opening and all of the gaps were minimal, allowing nice tight welds to be applied when the time comes to install the cowl for good.
Unfortunately, as tempting as it was to dive right in to straightening the flanges, I had to first get serious about removing as much rust, paint and seam sealer as I could from all of the areas immediately in the vicinity of the flanges themselves.  Here is where I really began to appreciate my sandblasting capabilities even more, but circumstances prevented me from making quick work of this with the sandblaster due to crappy winter weather and structural integrity concerns with the cowl out of the car.  As such, I decided it was best to resort to mechanical and chemical removal of the rust/crap around the flanges and the use of a “Zero-Rust” coating (more on this product in later installments) as a means of permanent protection.  The idea here was to only do what I needed to get the job done and then use my sand blaster to cover the rest of the areas when the car was structurally capable of being moved outside the shop again.  The end result is that the cowl end box enclosures are the only surfaces that will not be able to be sand blasted clean, but with the availability of a good rust attenuating coating like Zero-Rust, I believe everything will work out very well.
As mentioned in my tips below, I used about 1 quart of paint stripper to remove the relatively small amount of primer/paint, seam sealer and undercoating residue from all of the relevant surfaces.  As luck would have it, there was a surprising amount of clean, bare steel that was revealed.  The rust that remained was attacked with all manner of wire wheels, sanding disks, flap wheels, etc. until all that remained was the few areas that simply couldn’t be accessed for cleaning.  After all of this, I swabbed the whole works down with odorless mineral spirits to remove as much grease and dirt as I could.
Once I had good clean material to work with, I set out with my hammer and dollies to straighten every cotton-pickin' flange I could reach.  Every time I worked a flange straight, I would fit the cowl to check the fit.  After several days of this repetitive process, I had the cowl fitting almost perfectly on all of the saddle flanges and the window opening was almost perfectly symmetrical.  With the fit now as it should be, I clamped the cowl in place and drilled several 1/8” holes to allow the Clecos to pull everything down tightly and allow the panel to be repositioned in the exact same location every time.
With the cowl fitting complete, I swabbed the works again in mineral spirits and let it dry overnight.  Then I spent the next several days repeatedly treating all of the bare metal surfaces with phosphoric acid to thoroughly etch the metal and arrest any remaining rust that couldn’t otherwise be removed.  With that, I was ready to move to the next step of the process which involves repairing some severe rust damage in the driver side inner kick panel and welding a few small cracks in some of the flanges after they were straightened.  Until next time!

Along the top of the inside firewall, I used a sanding disk and wire wheel to remove the bulk of surface rust in the area just under the cowl flange.  This area is somewhat shrouded with the cowl installed and very difficult to clean properly with a sand blaster.
Passenger side cowl box after initial scrubbing with a knotted wire cup brush.


Driver side cowl box clean-up was a bit tougher due to the rather abrupt angle the cowl saddle flange takes at the rear (top right in the photo).


Passenger rear cowl box cleaned up very nicely.

After a considerable amount of hammer and dolly work on the saddle flanges, the fit is starting to close up nicely.

Here, the passenger side saddle flange fit almost perfectly.

The fit on the driver side is excellent.

Here's a shot of the driver side fit at the rear cowl box flange.  Excellent.

The passenger side saddle flange fit remarkably well also.

With the cowl panel fit as best as I could make it, the time had come to align the cowl one last time and clamp it in place using my high clamp force Clecos.  This allowed me to establish permanent alignment locations that would allow the cowl to be removed and refitted as many times as I wanted with perfect alignment every time.


More use of Clecos and welding clamps to fit the cowl.

With all of the fitting work complete, I cleaned all of the bare metal again with mineral spirits and treated everything with several coats of phosphoric acid over the course of several days.  Here is the etched and clean front flange.


Here is the phosphated passenger side saddle flange area.  The phosphoric acid treatment leaves a powdery crystalline coating that resembles dried soap film on all of the bare metal surfaces.

Passenger side outer cowl box fully treated.


Wednesday, December 29, 2010

Some simple but effective restoration tips by request

Since starting this blog, I have received numerous private messages inquiring on various techniques I use that I may not have detailed appropriately.  The two that seem to come up most often are: 
A. Undercoating removal
I had a rather funny but serious inquiry from a buddy asking why I never seem to complain about undercoating removal like so many other restorers.  At that point I realized I never covered that phase of my work because I just don’t struggle with it as a result of some sage advice from a fellow hobbyist and Studebaker restorer friend who was kind enough to recommend the undercoating removal procedure I use.  However, before I get to the details, I am going to warn you that what I am about to describe kinda runs against logic when you see the tools involved, but trust me, the process works and works very well (it’s super quick too!).
Quite simply, the way I remove the old crusty undercoating from any area is with a pneumatic air hammer.  Now, before you fall off your chair laughing at the thought of using an air hammer on your delicate sheet metal, take a second to follow along.
The two critical things in making this whole idea work is a good, quality air hammer that has an on board air adjustment and LOW air pressure.  I use a nice Craftsman adjustable air hammer that came in an air tool set I got several years ago (see photos).  With the air pressure dialed to no more than 20psi, and a slightly dull, broad blade chisel, the old undercoating practically jumps off the metal in fine pieces, leaving a very clean surface that can easily be cleaned up with a bit of solvent.
The technique is to lay the chisel edge at a relatively shallow angle to the surface and let the low pressure hammer blows “shock” the undercoating off the surface.  You can use your hand to direct the chisel head to help in removing undercoating from quite intricate areas.  With just a little practice, you can strip an entire wheel well in about 15 minutes.  My front fender aprons were heavily coated in undercoating when I started my resto.  Using this little trick, I managed to strip each side in less than a half hour each!  What little residue was left was easily removed during the sand blasting process in preparation for panel replacement (see earlier blog installments).
B. Chemical paint/goo stripping
I am a firm believer in using just about any means at your disposal to remove paint and other goo from your car during a restoration.  Also, while I like sand blasting for almost all rust and paint removal around the car, I do NOT like sending a car to a media blaster to remove paint/rust from the external body surfaces.  I’ll take care of that myself, thank-you.  I have seen far too many issues with the media and pressures used by most media blasters on the “beauty” surfaces of cars that I much prefer using my small, low pressure sand blaster to condition these surfaces AFTER using a D.A. sander and chemical paint stripper to do the bulk of the work head of time.
I am a big fan of products and tools that do more than one thing well.  I consider such things as nifty little bonuses and love when something works really well.  One product I really like for its multi-use features is a chemical paint stripper available at your local Home Depot (and other locations that carry the “Klean-Strip” brand of products, and it’s called Klean-Strip Premium Sprayable Stripper and is effective on paint, epoxy and polyurethane as well as powder coating, undercoating residue and seam sealer.  This stripper is better than any of the “aircraft” strippers I have ever used and is cheaper to boot. 
A word of caution is in order:  This is some of the nastiest poop you can get over the counter and will jack you right up if treated carelessly.  It will blister skin almost on contact and it stinks like death in a can, but work it certainly does.  Consider yourself appropriately warned and READ THE BLOODY INSTRUCTIONS AND PRECAUTIONARY MEASURES!
Aside from being a fantastic paint stripper, one of my favorite “bonus features” of this product is its ability to strip seam sealer and undercoating residue from just about anywhere.  As many of you will attest, old, dried seam sealer can be just as hateful (and often even more so) to remove than old undercoating.  This stripper will penetrate even the toughest seam sealer and lift it cleanly off with just a little scraping.  The accompanying photos will show how I used this stripper to remove the bulk of the paint, undercoating residue, spray adhesive residue and seam sealer from the cowl boxes on my Boss.
Another very important feature of this product is that it is neutralized and rinsed with odorless mineral spirits and NOT water.  Why on earth would you use water as a rinse agent on a restoration project where bare metal surfaces are regularly created?  With rust an ever-present enemy, any effort to avoid a moisture infusion is a worthwhile exercise.
I hope you find these two small tips useful in your restoration work.  As I come across other useful tidbits, I will try to document them here.  If you have any requests for information that I may not have covered appropriately, please feel free to drop me a note and I will do my best to document the information here.
Next time, I will cover more of my cowl panel replacement efforts!
Here is my favorite Craftsman adjustable air hammer that I use when removing stubborn undercoating.

And important feature is the adjustment knob in the handle of the air hammer.  This allows quick regulation of the impact force.

The trick is to use low air pressure to the air hammer.  Never go above 20psi when using this technique to remove undercoating.  If an adjustable air hammer is not available, adjusting the air pressure at the regulator works as well.

By keeping the chisel at a shallow angle to the surface, you run little risk of damaging the metal surface.  Also, note the wide, slightly dull chisel blade.

If you look closely at the trailing edge of the chisel, the undercoating is cleanly removed.

Another shot of the cleaned strip that results from just a few seconds with the air hammer.  At the low pressure used with this technique, the chisel is very easy to control and can even be "steered" by hand into very intricate places.

Here's a look at the same area after about 2 minutes work.  The residue that remains is very easy to remove with solvent or chemical paint stripper.

Here's a look at the undercoating on the drivers side cowl saddle area.

Another look at the drivers side cowl saddle area at the corner of the firewall.

After about 5 minutes work with the air hammer, the undercoating is gone.

A light residue is all that remains of the old undercoating and cleans up easily.

Here is a look at the outboard side of the passengers side cowl box.  The clean  bare metal is just as it appears after removing the undercoating with the air hammer.  No additional cleaning has been done here in an effort to show how cleanly some of the coatings come off the surface.

As chemical strippers go, it doesn't get any better than Klean-Strip Premium Sprayable Stripper.
Here, I have coated the entire inside cowl box with stripper.  Of particular interest is the inside corner of this panel which is completely sealed with old seam sealer.  No amount of scraping would make a dent in this stuff.

You can see the old undercoating residue that was left over is liquefied along with the old paint.

On the inside surfaces, the stripper tackles everything at once:  paint, undercoating residue, adhesive residue and seam sealer.

After two treatments of stripper, the seam sealer is gone along with the primer and paint.


Here is a look at the drivers side cowl box as well.

Here is a look at the undercoated areas that we previously stripped using the air hammer.  Note the clean bare metal that remains after the paint stripper was used to remove the undercoating residue.  I think we can work with that!

Friday, December 17, 2010

Cowl Panel Replacement - Episode 1: The Ugly Truth

Have you ever heard the comment:  “If it was easy, everybody would be doing it”?  Well, consider cowl panel replacement in a 69-70 Mustang to be the poster child for that statement.  Exhaustive research across the far reaches of the internet as well as through the archives of all of the Mustang magazines will produce annoyingly little helpful information on tackling this project on a 69-70 body car.  The tricky thing here is that the pre-69 cars, while similar, do not require the same repair techniques as the 69-70 and the differences between the jobs is significant in many ways.  Perhaps most significantly, the 65-68 cars have no outer cowl enclosures in their structure, making access to all of the critical structural weld areas much easier.  On the surface, this may seem like no big deal, but when you carefully evaluate the repair in a 69-70 car, you will quickly note there is no pleasant “path to paradise” in the proper replacement  of the cowl assembly and a lot more work will be required than what the available 65-68 repair articles will show.  With that in mind, I intend to document the details in the process of cowl panel replacement on my 70 in hopes it may help others contemplating the same work on their cars.
Here goes:
To begin, I must reinforce how critical it is to avoid getting in a hurry when performing this replacement and to understand that there will likely be a large volume of tangent repairs that will have to be made to achieve a proper overall repair.  Trust me, once the original rusty, crusty cowl has been removed, the number of other areas that will demand attention will be magnified exponentially.  After many days of studying this job from every conceivable angle, I determined this single project, while apparently simple in concept, will likely take me the bulk of the winter to complete.  Secondly, do not spare any expense on acquiring the proper tools for this repair!  Three essential tools you absolutely must have to do this job are: a Blair Premium spot weld cutter (the rotabroach variety), Cleco fasteners (the high clamping force type), and a variety of vise-grip type welding clamps.  Of course, the usual complement of hammers, dollies, drifts, punches, angle grinders, chisels, MIG welder, Band-Aids, Oreo’s, barley pop, etc. will also be required as well.
One thing that proved very deceiving was the perceived “advantage” of having a cowl that is already welded together and e-coated.  On the surface, this gives the impression of a part that is “ready-to-bolt-in”, but the painful reality of this is that is the farthest from true.  First, the car was never built with a pre-assembled cowl because it was (and is) impossible to properly weld the inner cowl flanges on the 69-70 body.  Secondly, there is absolutely no seam sealer on any of the interior cowl seams and these areas simply cannot be left unsealed with any expectation of long-term durability.  Unfortunately, unless you have arms like Kate Moss (ewww) and can contort the rest of your body to the shape of an ampersand, the task of sealing an assembled cowl is a mess to say the very least.  Third, in order to install the panel as an assembly, you must remove the outer cowl enclosures whether you like it or not.
The flip side is to take apart your brand new, beautiful pre-assembled cowl and install it like you would a 65-68 cowl.  This was impossible for me to justify as I just couldn’t bring myself to violate such a nice part by hacking it apart, but for some it may be the easier option, albeit with more risk involved.  Besides, once I removed my old cowl, it was painfully obvious that a lot more work was required to get the whole works into proper shape, if for no other reason than to soothe my conscience when the job is done.
The following photos document the start of the removal process for the old cowl and a bit of information showing several points of interest along the way.  There will be several more “episodes” to follow.
Before even the first spot weld is drilled out, I marked the exact location of both upper fender mounting tabs so the new tabs could be placed in the exact same location as the originals.

I like to use a wire brush in a drill to run around every seam so it is easier to identify spot welds that require drilling.

Here's a look down the front edge of the cowl with many spot welds visible.  Once I have them all located, I give each one a good center punch and I'm ready to drill.

Removing the old cowl requires that the top is removed first, then the bottom.  Here I have all of the spot welds drilled through the upper panel and have separated the seam around the front and sides.

Here, the top panel is clearly separated from the lower panel.

With the original top panel removed, you can see the extent of damage to the original lower cowl.  Also note how little corrosion protection existed in this cavity.  The vast majority of the enclosure is actually bare metal!

With little more than a bit of overspray to protect the steel, it is no wonder these areas are so vulnerable to the elements.

Here is the driver's side panel.  Rusted through as well.

There is a lot to be said about the next two photos.  First, you can see the interior of the cowl end enclosures are no better protected from corrosion than the rest of the cowl enclosure.  Unless these end enclosures are removed, there is little hope of effectively cleaning and treating these areas properly and absolutely no possibility of properly welding in the cowl along the inner cowl ledges.  Also, a particularly disappointing discovery is that everywhere the factory seam sealer was applied is covered in rust.  And I do mean EVERYWHERE!


The spot weld locations from the top panel supply the blueprint for drilling out the lower cowl welds as well.  I center punched each weld a second time and removed each one with my Blair Premium spot weld cutter.  After a bit of careful prying with a heavy putty knife blade, the lower panel was lifted away cleanly........only to reveal more rusty flanges where the factory seam sealer was.
Once the lower cowl panel was removed, I removed the outer cowl enclosure panels.  Here is a look at the passenger's side cavity.  Notice how little overspray the actually is in this area.
The same can be said for the driver's side cavity as well.

Here is a look at the inside seam of the new cowl.  Notice anything missing?

Absolutely no seam sealer of any kind exists in the new cowl, even around the base of the "chimney" pipe.  I plan to use a paintable 2-part urethane seam sealer on every seam, but applying it is going to be a real trick.

Note the nicely e-coated surfaces inside the new cowl, but the lack of any seam sealer.


Of course, a test fit of the new cowl was a must.  As good as this may look here, the fit was actually quite lacking and I was able to identify MANY areas requiring attention in order to get the fit as good as possible.

Primary alignment of the new cowl is achieved by using two steel drifts in the firewall brace holes.  This keeps the panel properly aligned and makes repositioning quite easy.

Here, you can see how poorly the initial fit-up was on the passenger side.  The gap seen in the middle of the frame is approximately 3/8".

Fore-aft alignment of the panel was pretty good, but will improve with more flange work.
That's where I am for now.  I have started the tedious work of honing the fit of the panel and will document the many hours involved in removing rust, identifying and repairing hidden damage, and applying rust preventive coatings and seam sealer to the various areas of concern before the panel can be actually welded in.  Stay tuned for Episode 2!