When I last left my work on the cowl, I had made several test fittings and discovered many areas that simply did not fit well. Most of this was due to the severely deformed saddle flanges that existed once the old cowl was removed. Evidently, the method of welding the original cowl in the car resulted in the operators’ ability to severely twist the spot weld clamps while the metal was hot, making each spot weld area a real mess. Most of this irregularity was taken up by the weld through seam sealer, but there were definitely spots that were never sealed properly and this is where most of the heavy damage had centralized. So, after all my test fitting, I set off to straighten up the saddle flanges such that the new cowl would sit squarely in the opening and all of the gaps were minimal, allowing nice tight welds to be applied when the time comes to install the cowl for good.
Unfortunately, as tempting as it was to dive right in to straightening the flanges, I had to first get serious about removing as much rust, paint and seam sealer as I could from all of the areas immediately in the vicinity of the flanges themselves. Here is where I really began to appreciate my sandblasting capabilities even more, but circumstances prevented me from making quick work of this with the sandblaster due to crappy winter weather and structural integrity concerns with the cowl out of the car. As such, I decided it was best to resort to mechanical and chemical removal of the rust/crap around the flanges and the use of a “Zero-Rust” coating (more on this product in later installments) as a means of permanent protection. The idea here was to only do what I needed to get the job done and then use my sand blaster to cover the rest of the areas when the car was structurally capable of being moved outside the shop again. The end result is that the cowl end box enclosures are the only surfaces that will not be able to be sand blasted clean, but with the availability of a good rust attenuating coating like Zero-Rust, I believe everything will work out very well.
As mentioned in my tips below, I used about 1 quart of paint stripper to remove the relatively small amount of primer/paint, seam sealer and undercoating residue from all of the relevant surfaces. As luck would have it, there was a surprising amount of clean, bare steel that was revealed. The rust that remained was attacked with all manner of wire wheels, sanding disks, flap wheels, etc. until all that remained was the few areas that simply couldn’t be accessed for cleaning. After all of this, I swabbed the whole works down with odorless mineral spirits to remove as much grease and dirt as I could.
Once I had good clean material to work with, I set out with my hammer and dollies to straighten every cotton-pickin' flange I could reach. Every time I worked a flange straight, I would fit the cowl to check the fit. After several days of this repetitive process, I had the cowl fitting almost perfectly on all of the saddle flanges and the window opening was almost perfectly symmetrical. With the fit now as it should be, I clamped the cowl in place and drilled several 1/8” holes to allow the Clecos to pull everything down tightly and allow the panel to be repositioned in the exact same location every time.
With the cowl fitting complete, I swabbed the works again in mineral spirits and let it dry overnight. Then I spent the next several days repeatedly treating all of the bare metal surfaces with phosphoric acid to thoroughly etch the metal and arrest any remaining rust that couldn’t otherwise be removed. With that, I was ready to move to the next step of the process which involves repairing some severe rust damage in the driver side inner kick panel and welding a few small cracks in some of the flanges after they were straightened. Until next time!
 |
| Along the top of the inside firewall, I used a sanding disk and wire wheel to remove the bulk of surface rust in the area just under the cowl flange. This area is somewhat shrouded with the cowl installed and very difficult to clean properly with a sand blaster. |
 |
| Passenger side cowl box after initial scrubbing with a knotted wire cup brush. |
 |
| Driver side cowl box clean-up was a bit tougher due to the rather abrupt angle the cowl saddle flange takes at the rear (top right in the photo). |
 |
| Passenger rear cowl box cleaned up very nicely. |
 |
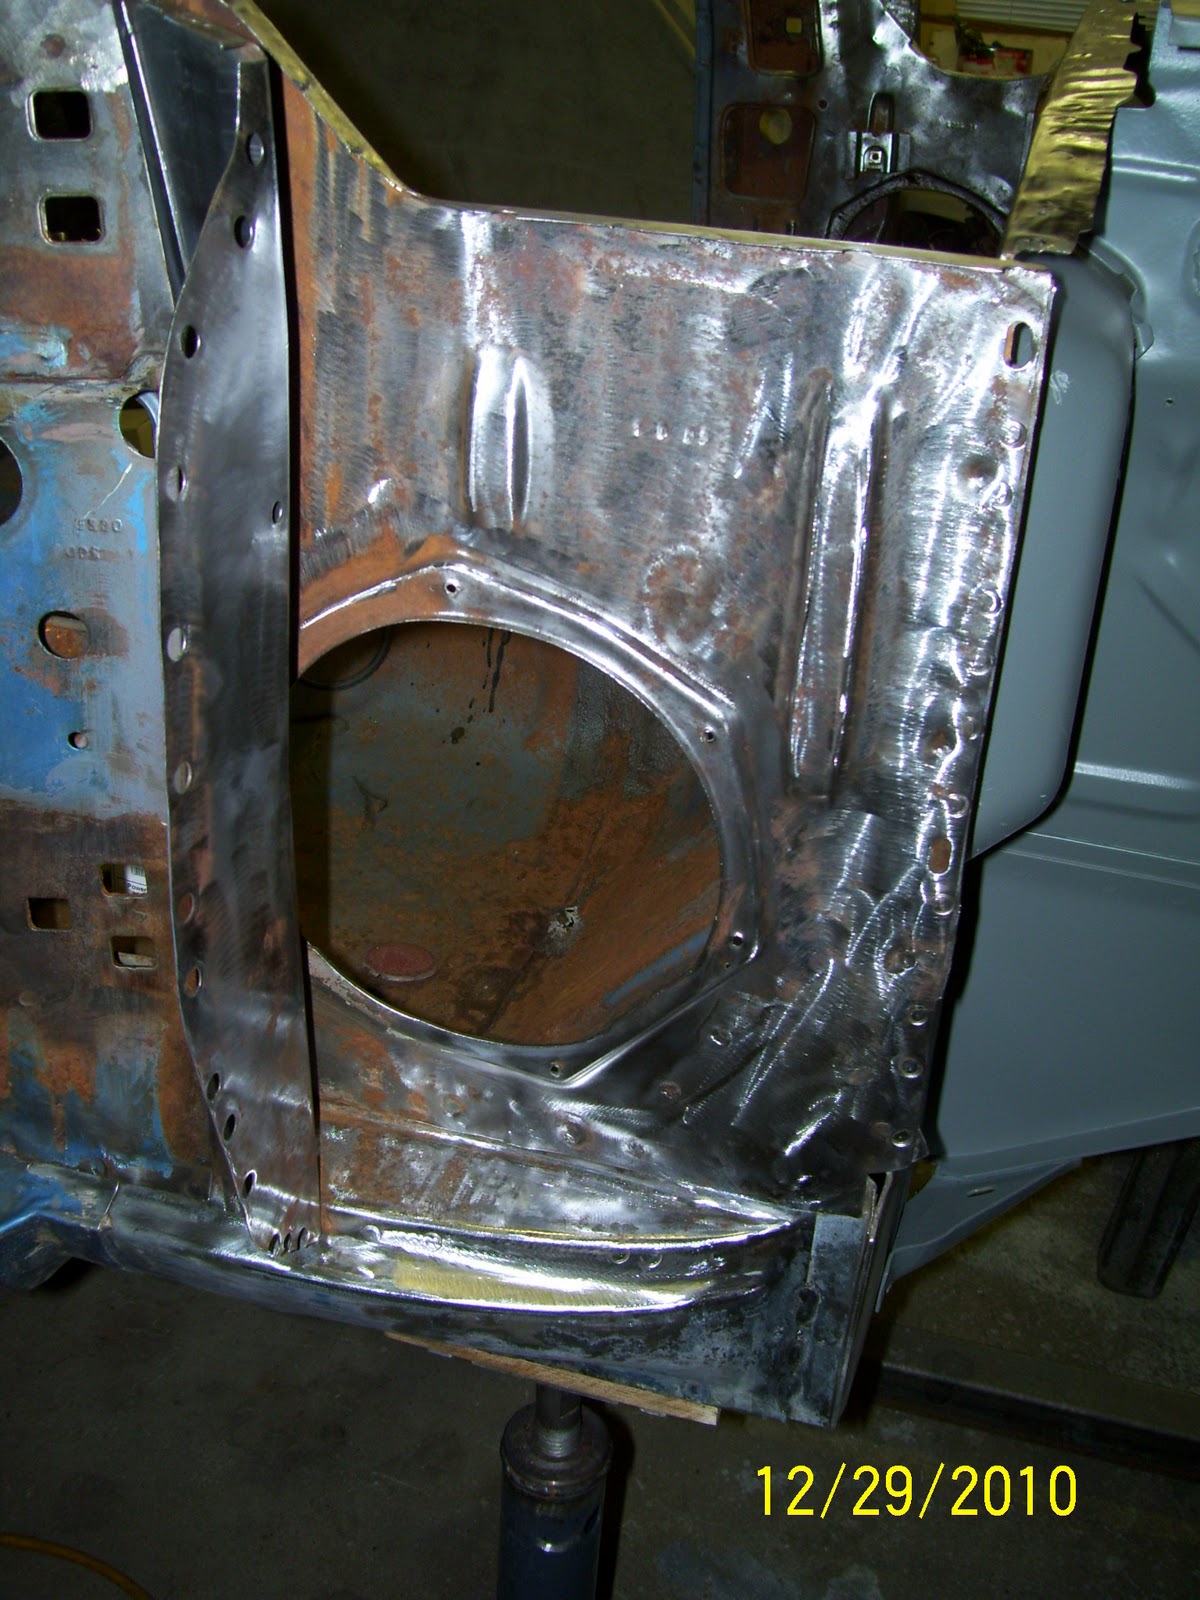
| After a considerable amount of hammer and dolly work on the saddle flanges, the fit is starting to close up nicely. |
 |
| Here, the passenger side saddle flange fit almost perfectly. |
 |
| The fit on the driver side is excellent. |
 |
| Here's a shot of the driver side fit at the rear cowl box flange. Excellent. |
 |
| The passenger side saddle flange fit remarkably well also. |
 |
| With the cowl panel fit as best as I could make it, the time had come to align the cowl one last time and clamp it in place using my high clamp force Clecos. This allowed me to establish permanent alignment locations that would allow the cowl to be removed and refitted as many times as I wanted with perfect alignment every time. |
 |
| More use of Clecos and welding clamps to fit the cowl. |
 |
| With all of the fitting work complete, I cleaned all of the bare metal again with mineral spirits and treated everything with several coats of phosphoric acid over the course of several days. Here is the etched and clean front flange. |
 |
| Here is the phosphated passenger side saddle flange area. The phosphoric acid treatment leaves a powdery crystalline coating that resembles dried soap film on all of the bare metal surfaces. |
 |
| Passenger side outer cowl box fully treated. |


You did a very nice job of aligning those cowl saddles. It's a bummer you didn't get to sand blast but you did a great job of cleaning up by hand. Top notch job!
ReplyDeleteThanks Alex! Initially, I was coincerned that I wouldn't be able to get things clean enough to go back together, but I think everything will work well and the areas I can't blast are now quite minimal. Should be good to go.
ReplyDelete