As I mentioned in my last update, I have been thinking about a sneaky way to fabricate a patch for the driver side rear floor transition area that was rusted out of my car. To date, I have found no one who makes a repair patch for this area, although complete over-the-axle panels are available at hellish cost and I didn’t want to gut that area of my car for no better reason.
After finishing the front toe board patches, I was sitting on my duff looking at the scraps left over from the right side toe board patch panel I bought from NPD. All at once it hit me that the contour of the patch that was meant to go up the inside of the trans tunnel looked an awful lot like the rear transition panel. So, over the course of a couple of evenings, I compared the contours of the rear floor areas to the scrap patch and determined I could make a rather acceptable patch panel with a bit of metal work and some careful fitting!
I started by laying out the patch on the areas of the toe board scrap leaving as much room as I could to have plenty of metal to work with. I cut the donor pieces with my tin snips and rotary shear and started fitting the panels to the rear transition area of the floor to determine the contouring that would be required to get them to fit. Once I had the contours figured out, I spend a few hours alternating between hand forming and hammer-and-dolly work to gradually reshape the donor pieces until I had them fitting the floor as best as I could. I clamped each panel in place to mark them for trimming and with the fit just as I wanted it, I welded the outboard corner to the larger inboard section so I was working with a single patch panel that could be massages and fitted all at once.
Once the patch was formed completely, I traced the profile on the original structure and cut out the offending rusty metal. With plenty of clamps in place, I tacked the patch in completely and followed it up by but welding the entire seam in roughly ¼” stitches. The outboard corner was quite thin and it got a bit slobbery looking when all of the small pinholes were finally welded up, but the remainder of the weld bead was quite nice with excellent penetration.
With the patch welded in solid, I was left with a small, pie-shaped cleft where the front edges of the two pieces wouldn’t quite meet. This was simply a function of how the donor material needed to be cut to fit and was an easy fix. With a little work from the tin snips, I widened the gap to a nice broad triangle and cut a filler piece from some of the leftover toeboard material and welded it in. Simple as that.
With the entire repair fully welded, I began the metal finishing process and ended up with a nice, very solid repair that looks like it will be every bit the equal of a commercial patch (if one were available). So, after an overnight treatment of phosphoric acid, the patch was complete and ready for integration with the new floor pan!
The final step I wanted to complete before the weekend was out was to get the firewall protected with a good coating of Zero Rust paint before I started the formal fitting of the floor pan. Having already phosphatized the entire firewall, I started the job by thoroughly cleaning the entire area to be painted with PPG Acryli-Clean DX-330. This is a naphtha-based cleaner/degreaser that I use religiously before any priming or painting of any kind. Once this product dries, I tacked off the entire area and mixed a batch of black Zero Rust 4:1 with PPG DT-870 reducer and shot a medium coat over the entire firewall. It is worth noting that all other colors of Zero Rust can be mixed at 5:1 due to their slightly thinner consistency than the black.
Once the first coat was dry to the touch, I mixed another batch of Zero Rust and shot the whole area again. This coat will be allowed to dry for a day or two while I prepare to start fitting the new floor. I can’t wait to see how the car will look with a nice, pristine floor in place of the rusted hulk that was there for so long!
Until next time!
 |
| As unsuspecting as it may seem, this leftover scrap from the right front toeboard patch panel can donate just enough material to make a fine rear transition panel patch. Here, the two pieces that will become the new patch panel have already been cut from the donor part. |
 |
| These two pieces will be combined and shaped to make the patch I require. |
 |
| Here is the larger of the two pieces being slowly shaped to fit the required contours. A lot of hand forming was needed to get the fit just right. |
 |
| Once the larger piece was fitting well, I started evaluating the smaller piece. |
 |
| From a few feet away, the prospects of this crazy idea working look pretty good, even if the parts are just laying in place! |
 |
| In order to clear the rear seat belt mounting reinforcement, the patch panel needed to be trimmed such that the cut line was below it. That is the "dip" in the cut line at the left of the photo just below the seat belt mounting hole. |
 |
| Because of the complex curves of the patch, I decided to weld the smaller piece to the larger piece to make it easier to form and fit the panel in its new space. |
 |
| With the patch fit completed, I trimmed the parent metal to fit the patch precisely. |
 |
| I tacked the patch in place at several locations. |
 |
| Then I welded the patch in completely using 1/4" stitches all around. |
 |
| Other than the slobbery corner weld, the beads were actually nice and tidy for the most part. |
 |
| As noticed in the earlier shots, a small cleft existed between the two pieces of the patch at the front edge due to the fact that there wasn't quite enough material on the smaller piece. Once the patch was welded in, I cleaned up the cleft by cutting a nice symmetrical triangular section out of the area with my tin snips. |
 |
| I cut a corresponding patch of material from the donor panel and clamped it in place for welding. |
 |
| Here is the completely welded patch panel, ready for grinding and metal finishing. |
 |
| Here is a shot of the back side of the weld seams. Good penetration everywhere with only a little grinding required to clean things up. |
 |
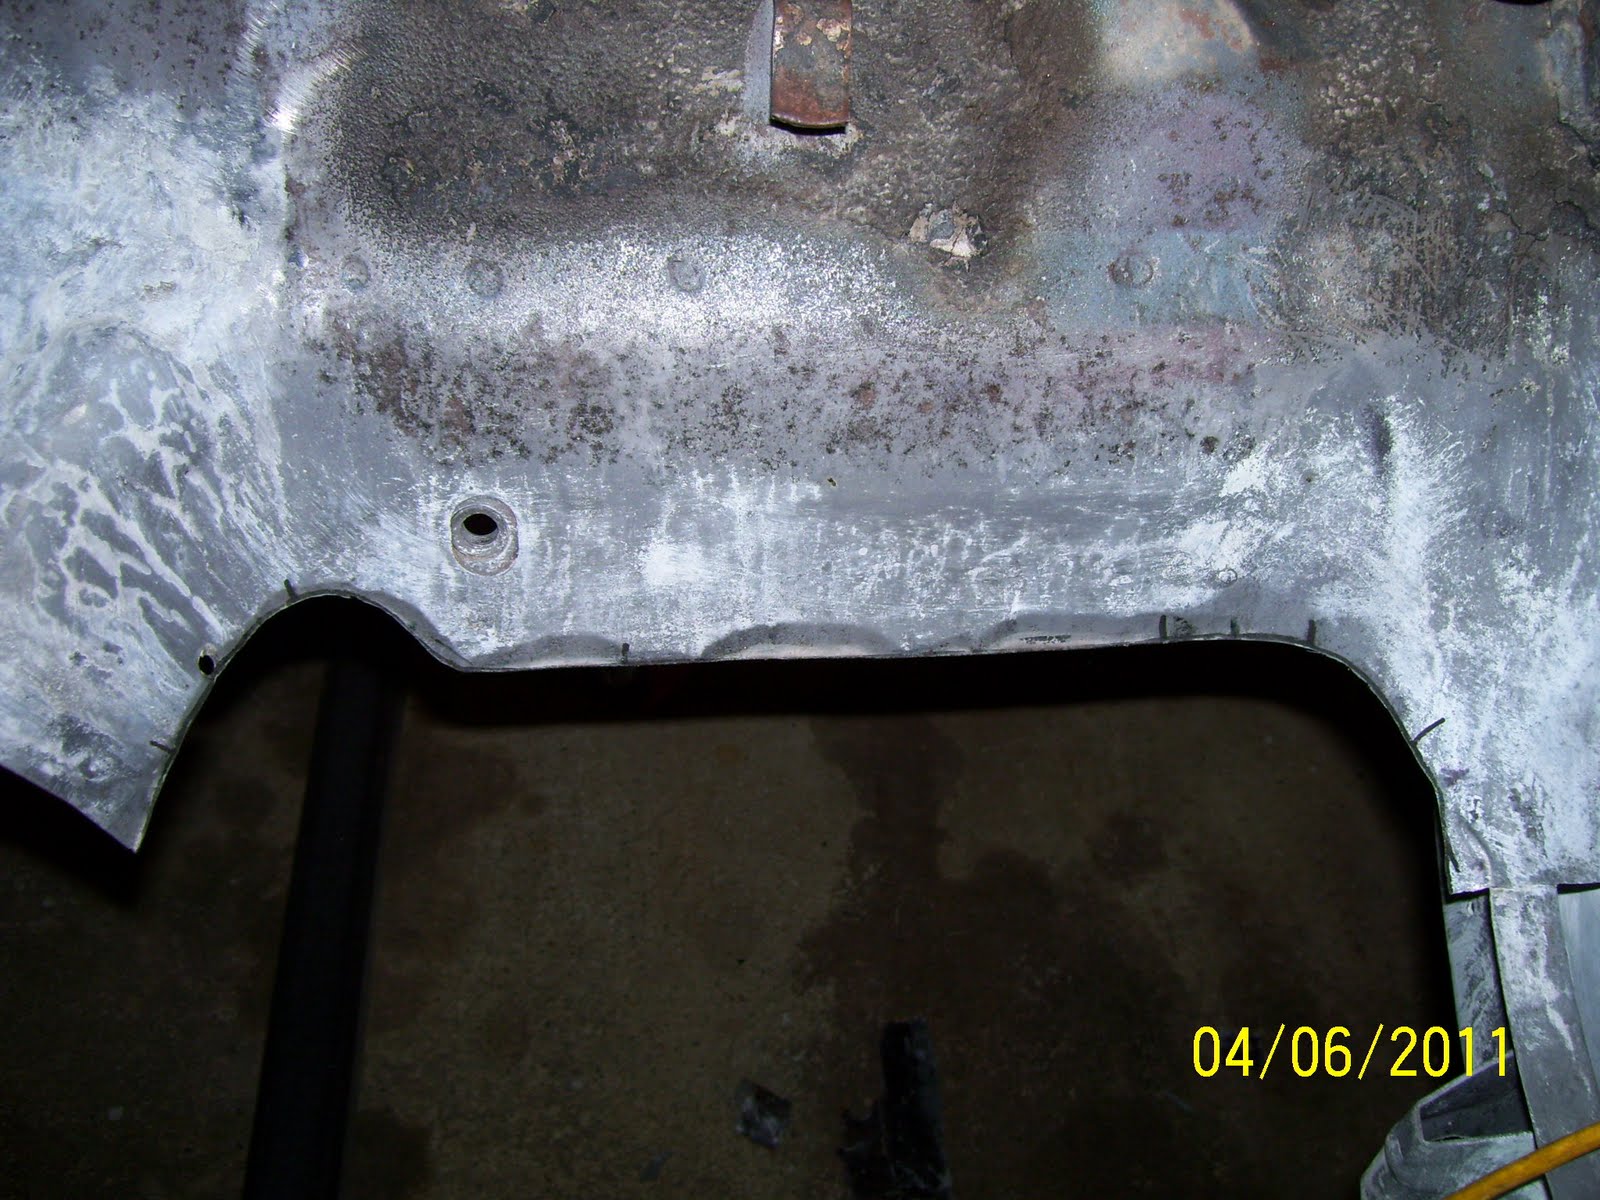
| Welds ground smooth and metal finishing complete! |
 |
| Inside of the finished patch. I hope it works! |
 |
| Here is the firewall after being scrubbed with PPG Acryli-Clean and tacked off. |
 |
| I masked all of the holes off to keep overspray under control. |
 |
| Two medium coats of Zero Rust and the firewall is protected. |
 |
| View of the driver side firewall after Zero Rust...... |
 |
| and the passenger side as well. |


Very nice job!
ReplyDeleteYou are the patch making KING! Looks great.
ReplyDeleteJames & Alex,
ReplyDeleteThanks, as always, for the encouragement and compliments. Can't wait to start fitting the new floor!
That looks great! Just wondering - did you spray the ZR outside, or in your shop?
ReplyDeleteThanks! I sprayed the ZR in my shop with nothing more than a plastic disposable drop cloth on the floor. The Turbine HVLP spray system I use is unbvelieveably efficient in putting paint on the surface rather than in the air or on the floor that I can get away with this without problems. Can't say enough good about it.
ReplyDelete