As spring tries desperately to show its mug here in not-so-sunny Michigan, I have managed to make the best of the comfort and security of my shop to make significant headway on the Boss. When I left off, I had managed to sand blast the areas of the floor pan area that I would be working on over the next several weeks in preparation for the installation of a new, one-piece floor pan. With nice, clean metal to work with, I set off on a mission to replace the damaged metal in both front toe boards where the ravages of rust left their distinctive mark along with repairs to each of the rear torque boxes which were damaged as well.
Before the sand blasting, I had already cut and fit the toe board patches, so I was confident that I had good pieces to work with when it came time to weld. However, the removal of the old floor left several spot weld cutter divots in the frame rail flanges and along the floor pan flange areas that I needed to weld up and smooth before going any further. This involved a good solid evening of welding and subsequent grinding to get everything in shape. Also, I discovered two more stress cracks above the rear driveshaft tunnel that required welding as well. However, with everything welded up and ground smooth, I was happy to have nice flat flanges, ready for a new floor.
Before moving on to some strategic application of Zero Rust paint, I sprayed everything down with phosphoric acid to prep and protect the bare metal surfaces. After letting this dry overnight, I scrubbed everything with mineral spirits and a scotch bright pad to remove any excess deposits (especially on the galvanized metal) and let that dry thoroughly. This left a nicely phosphatized surface that was ready for a thinned coat of Zero Rust in the hidden areas below the toe boards as well as the rear torque box enclosures.
Since I had already fitted the patches to the toe boards, I started by locating and drilling each plug weld that would be required in each patch. Because the passenger side patch was so small and required so few plug welds, I could effectively clamp the patch with locking pliers and welding clamps without the need for clecos. As such, this patch went in quite quickly. As another testament to the Lincoln 180C wire feed welder, the weld penetration on this very thin sheet metal was remarkably good and I only needed a little bit of “touch-up” on the back side to make me confident that the patch was welded securely. After a little bit of clean-up grinding, I rolled the bottom edge to duplicate the features of the original panel and to add some strength to the free edge.
The driver side toe board patch required quite a bit more effort to install due to its size and complexity compared to the passenger side. With a combination of clecos, welding clamps and locking pliers, I secured the panel in place and began by tacking the edges of the patch in place to lock everything down without fear of disturbing the precise fit between the panel and the main structure. From there, I systematically drilled plug weld holes with my spot weld cutter at each cleco location a replaced the clecos with plug welds as I moved across the patch. This technique pulled the patch down nice and tight against the underlying structure and allowed the remainder of welding to proceed without fear of the patch moving around.
With both patches fully welded in, I rolled the lower edge of the driver side patch and finished them up by grinding each seam flush on the inside and outside. Once I have the floor in, I will skim the seam areas with a thin coat of filler to smooth the entire area, making the repairs completely invisible.
Next on the agenda was to complete the repairs to the rear torque boxes. First I straightened the lower surfaces of each torque box using the same technique I used to straighten the lower surfaces of the front frame rails a few episodes back. With the panel beating done, I fit each torque box cover and scribed where each one required trimming. Using my trusty pneumatic metal-eating-wheel-of-death, I cut off the extra material I didn’t need and drilled the plug weld holes along each flange. The nice, wide flanges of these panels make drilling the plug weld holes quite easy.
With both torque box covers trimmed, drilled and fit, it was time to clamp them in place and weld ‘em in! Here again, the locking pliers, and welding clamps are critical to getting these complex little panels to fit well on all flanges. In fact, other than being a bit short on the inboard flange edges, these patch panels from NPD fit quite well and require very little massaging to work well. Once clamped securely in place, I simply walked around the panel with plug welds, moving the clamping pliers and welding clamps as I went, until everything was solid. As with the other patches, I ground the welds down smooth with my 2” angle grinder and prepared to coat the new patches with phosphoric acid to protect the new metal.
Next on the agenda will be to fabricate the patch panel to repair the driver side rear floor transition panel that was devastated by rust. I have been studying this closely and might just have a sneaky, underhanded, absolutely unauthorized trick up my sleeve to pull this repair off………..maybe.
 |
| I drilled several spot welds a bit too deep with the spot weld cutter and didn't like the divots left behind. So, I decided to weld up each one of them around the floor area to make sure I would have good solid flanges to work with. |
 |
| Here are several repairs made to the rear frame rails and floor flanges. |
 |
| While I was inspecting this area after sandblasting, I discovered two more stress cracks (four total) at the rear tunnel area that required welding. |
 |
| Weld divots and stress cracks welded and ground smooth at the rear floor area. |
 |
| Rear frame rails looked very nice once the welds were smoothed. |
 |
| Although almost whitewashed in this picture, the actual surface of the phosphatized surfaces is not nearly this spectacular. |
 |
| Here are the flange areas at the rear after phosphoric acid treatment and scrubbing with mineral spirits. |
 |
| The torque boxes are galvanized and take on a heavy white/grey patina after phos. |
 |
| Another look at the galvanized rear torque box areas after phos. |
 |
| As much as I hate brushing on Zero Rust paint, it was the best way to protect the hidden areas under the toe board patches. Here is the passenger side. |
 |
| Here is the driver side toe board area coated with Zero Rust. |
 |
| I coated the inside of both rear torque boxes with Zero Rust as well. |
 |
| With the passenger toe board patch pre-fit, I just added a few plug weld holes and clamped it in place. |
 |
| I tacked the patch in place and followed up by welding up the plug weld holes. |
 |
| The panel was fully welded around the perimeter using short weld "stitches" around the seam. |
 |
| Weld penetration with my new welder is excellent! I love this machine! |
 |
| The free edge of each toe board is slightly rolled to match the look of the original panel and add strength. |
 |
| The driver toe board patch was clamped and cleco'd in place to secure it precisely. |
 |
| I started by tacking it completely around the gap to ensure the fit was locked down. |
 |
| Then I systematically replaced the clecos with plug weld holes drilled with my spot weld cutter. Then I simply walked around the panel welding up the plug welds at each location. |
 |
| Here's the driver side patch from underneath after grinding. |
 |
| And here's the passenger side....... |
 |
| Passenger toe board from the top. |
 |
| Driver side toe board from the top. |
 |
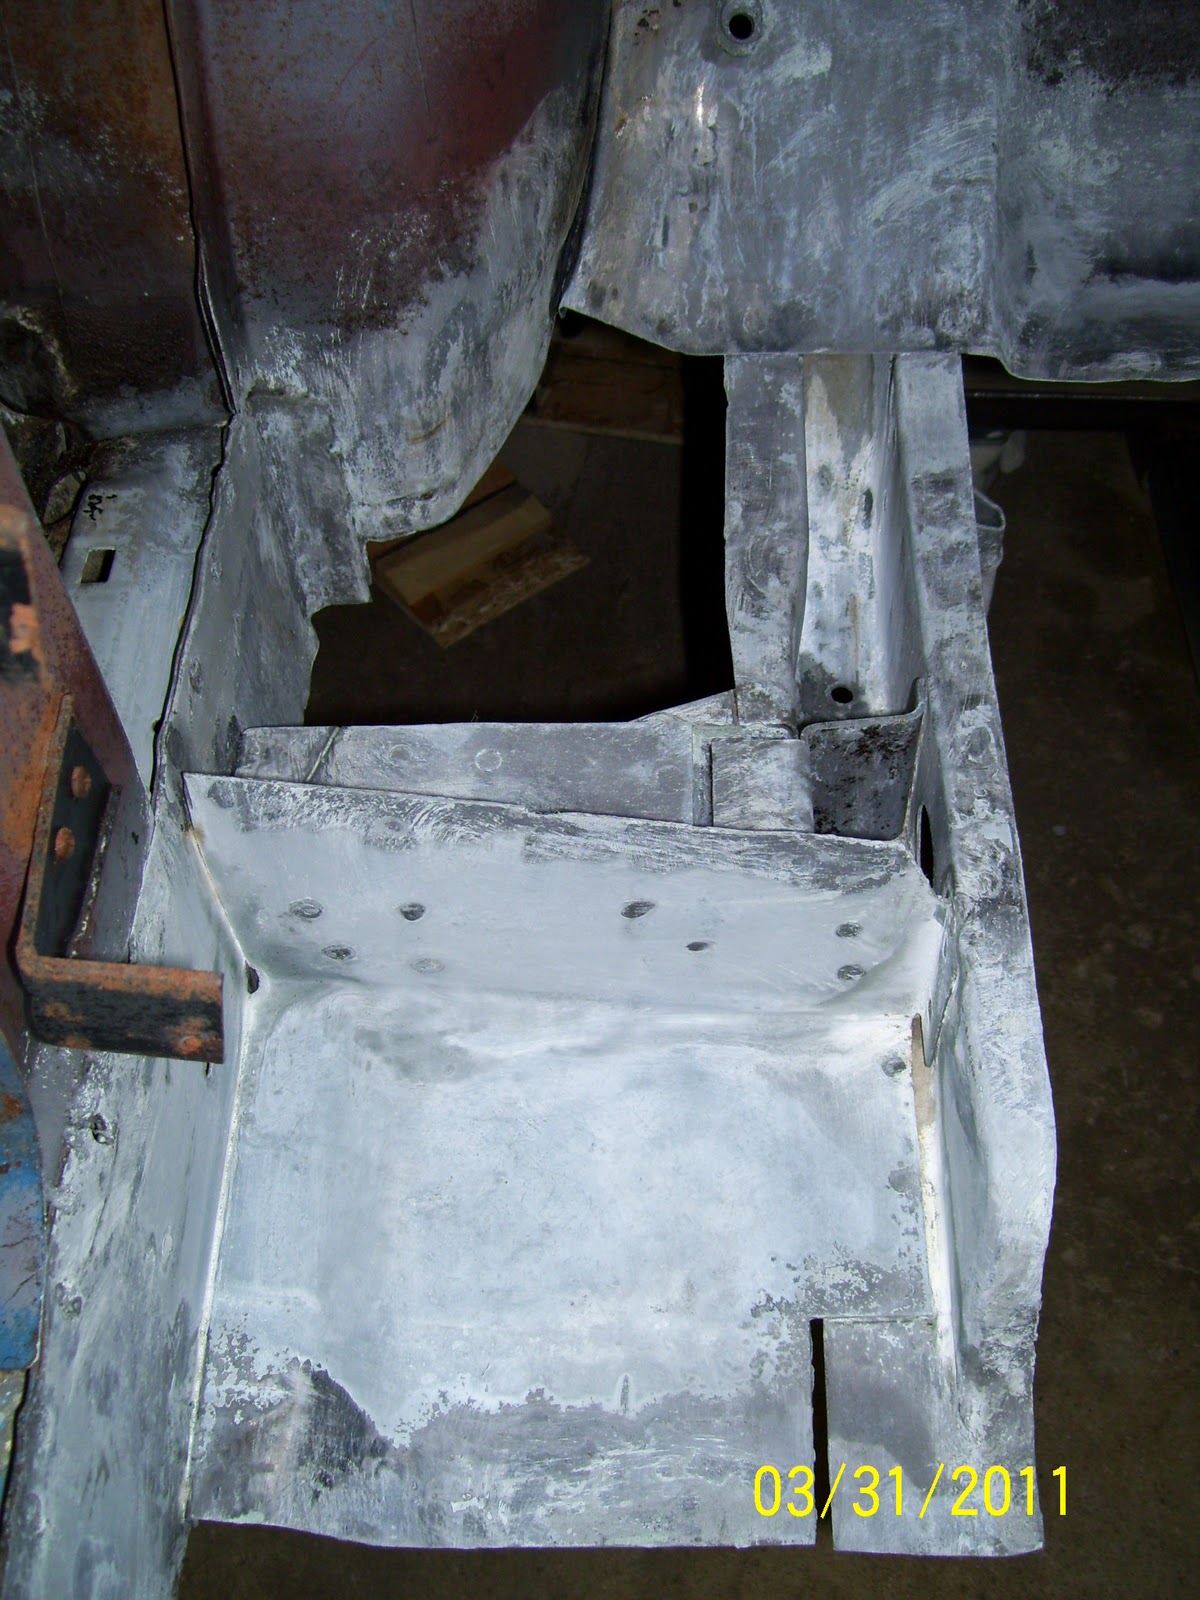
| The torque box covers were first clamped into place and scribed for trimming and marked for plug weld locations. |
 |
| Rear torque box cover after trimming and drilling. We're ready to weld! |
 |
| To keep everything in place for welding, I use many clamping pliers and welding clamps to keep the fit tight. |
 |
| Here is the passenger torque box cover welded in. |
 |
| And here's the driver side torque box cover welded in. |
 |
| With the welds ground smooth, the torque box covers are ready for the next step. |
 |
| With a coating of phosphoric acid, the metal will be protected until I can get the floor pan installed and primed. |
 |
| Driver side toe board after phosphoric acid treatment. |
 |
| Finished passenger rear torque box after phos. |
 |
| Finished driver side rear torque box after phos. |


Very clean and thorough work. Your patches fit really well and look great. Good job Sven!
ReplyDeleteThanks Alex! Feels good to be getting closer to having a solid floor in the car again. Not sure I'm gunna know how to act!
ReplyDelete