Sometimes, it seems like I put many hours into small projects and feel I never make significant progress. Then, I review the photos and the “before-and-after” once again shows that significant progress has been made. In truth, I think it’s just that large-scale improvements (like the floor installation of a few weeks ago) are so good for morale that when the focus returns to the smaller (but no less significant) restoration projects, you feel as though you’re suddenly underachieving or some such nonsense. This has been the past few weeks for me.
After carefully writing up a comprehensive “to-do” list, I set about tackling a number of tasks that required attention before being able to move to the rear of the car for structural repairs. First on the list was to fit and install the new seat pans, followed by a general tidy up of all the welds on the bottom of the car, fitting the Heidt’s subframe connectors, and filling the repaired areas of the firewall so I could prepare to prime all of the bare metal areas before moving on to other things. In a major restoration project, you have to be constantly disciplined to make sure that there is not too much bare metal exposed to the elements or you’ll chase rust formation forever. With the floor installed, I felt the time was appropriate to do a little housekeeping on this front so I could quit worrying about rust settling in on my nice fresh sheet metal repairs.
With the floor installed, the seat pan installation was the next step. I bought the best quality seat pans NPD had available and were marked as Dynacorn parts. With my now ingrained cautiousness, I started evaluating the fit of these pans with a jaundiced eye. As expected, the fit was something short of what I had hoped, but quite workable nonetheless. I thoroughly documented the position of the original seat pans before removing the old floor so I simply duplicated those dimensions when fitting the new seat pans. Flange fit required some massaging and there were a few small spots that required trimming to get the fit as good as possible. After about a half hour of work per pan, I was able to punch the flanges for plug welds and tack them in. I decided it best to tack in both seat pans to ensure their position and fit would be locked down and to make it easier to weld them in one smooth operation. With little fanfare, the pans went in quite nicely with good fit around all flanges. Weld penetration was very good and the underside of the weld showed the telltale signs that the floor was indeed galvanized steel (as advertised) as evidenced by the white powdery plumes radiating from each weld location along the bottom of the floor. That’s good news. After a few minutes cleaning up this residue with degreaser and scuffing the area with medium grit Scotch Brite pads, I protected the bare seat pan spot welds with SEM high build spray primer and moved on to the next project.
Next, I began tidying up all of the welds on the bottom of the car from the firewall to the rear axle tunnel. Even though this entire area will be coated in SEM truck bed liner material, I want the bottom to be smooth and clean. You get a real appreciation for how complex a unibody car actually is when you have to smooth literally hundreds of spot welds to get everything cleaned up. Its tedious work and I hate it, but the results will be rewarding in the long run.
The Heidt’s subframe connectors were rather remarkable right out of the box. As fabricated parts, I am inclined to be suspicious that they would fit as well as they did. I knew ahead of time the rear portion of the front frame rails would require slight modification to allow the subframe connector saddles to fit properly. After a few minutes with a cutoff wheel and my angle grinder, the front frame rails were ready to accept the connector saddles. Using long drifts to locate the rear suspension pickup holes, I fit the passenger side connector first. With almost no effort, the connector fit extremely well and lined up with the rear suspension holes quite well. Moving on to the driver side, I found our right away that some slight modifications would be required to the inboard wall of the subframe connector saddle to clear the e-brake bracket welded to the left frame rail. Even though I will not be using this bracket, I have committed to leaving it in place should I ever find myself deciding otherwise. Again, after some quick measurements, the cutoff wheel was used to trim a notch in the saddle and then I cleaned up the edges with the angle grinder. The reward was another perfect fit of the subframe connector. Done!
If you have been following my blog for a while, you may recall that my car endured at least one major clutch explosion in its history, resulting in pretty significant damage to the firewall directly above the trans tunnel. In earlier posts, I worked the damaged metal out with a hammer and dolly as close to the factory contours as possible. Along the way, I also repaired the toe boards and now all of these areas required a thin skim of body filler to get everything ready for primer.
Since I had already primed the firewall once for long term protection, I started by grinding the repair areas down to bare metal with my angle grinder and 50 grit sanding disks. Once this was done, I cleaned the repair areas with PPG DX-330 Acryli-Clean solvent and let it dry. With the surfaces now ready to accept the body filler, I mixed up a small batch of Evercoat RAGE Gold lightweight filler and mixed it thoroughly with a small amount of hardener. When properly mixed, the color is a putrid yellow/green color and has a working time of about 6-8 minutes. Using flexible plastic spreaders, I applied a medium coat of filler to the requisite areas trying hard to make the application as smooth as possible to reduce the work required to get it sanded smooth. After about 10 minutes, the material is almost rubbery in its consistency and prime for rough shaping with Surform tools (sometimes called cheese grater files). These tools make knocking down the high spots quite quick and easy and save countless hours of sanding by getting rid of the bulk of excess filler material with incredible ease and efficiency. So, with the big chunks knocked down, I let the works harden over night to ensure a complete cure of the filler.
The following day, I began the tedious sanding process required to get the repaired sections nice and smooth. I like using the 3M adhesive-backed sandpaper that is the perfect width to fit my Durablock sanding blocks. For this work, I use 80 grit paper to get the shape set and leave a good surface for the second application of filler to grip to. Once I have brought the surface down to where I wanted it, I marked the low spots with a pencil and mixed up another small batch of filler to cover the spots that required a bit more work to level. Again, an overnight hardening spell, and I was back again with the 80 grit sandpaper to sand the surface smooth. After an hour or so, I was quite satisfied with the resulting contours.
Now, the mission is to sandblast the bare metal areas and welded flanges to remove any potential surface rust that may have developed and to remove any blistered primer that resulted from weld heat. Once that is complete, I will lock the whole area down with PPG DF40-LF primer/sealer and continue working toward the rear of the car. There’s LOTS of work left to do before we leave the floor area, but I could really use a nice, dry sunny day around here so I can get the required sand blasting done…….
 |
| With measurements from the original seat pans in hand, positioning the new pans was rather easy. Fit of the pans required a bit of massaging to get right. |
 |
| I used my trusty white paint pen to mark the locations of the pans for ease of positioning while the fitting process was underway. |
 |
| Sheet metal modifications were thankfully minor. This small section (marked with an "x") required trimming to mirror the configuration of the original seat pan. |
 |
| Rocker flanges fit very well and here you cans ee I have already punched the plug weld holes. |
 |
| The front flanges required the most work and needed a tweak of about 10 degrees to get them to seat properly on the floor. |
 |
| Here is the rear tab trimmed and dressed: ready for welding. |
 |
| After tacking seat pans and checking for fit, I welded them in permanently. This is the driver side pan tacked. |
 |
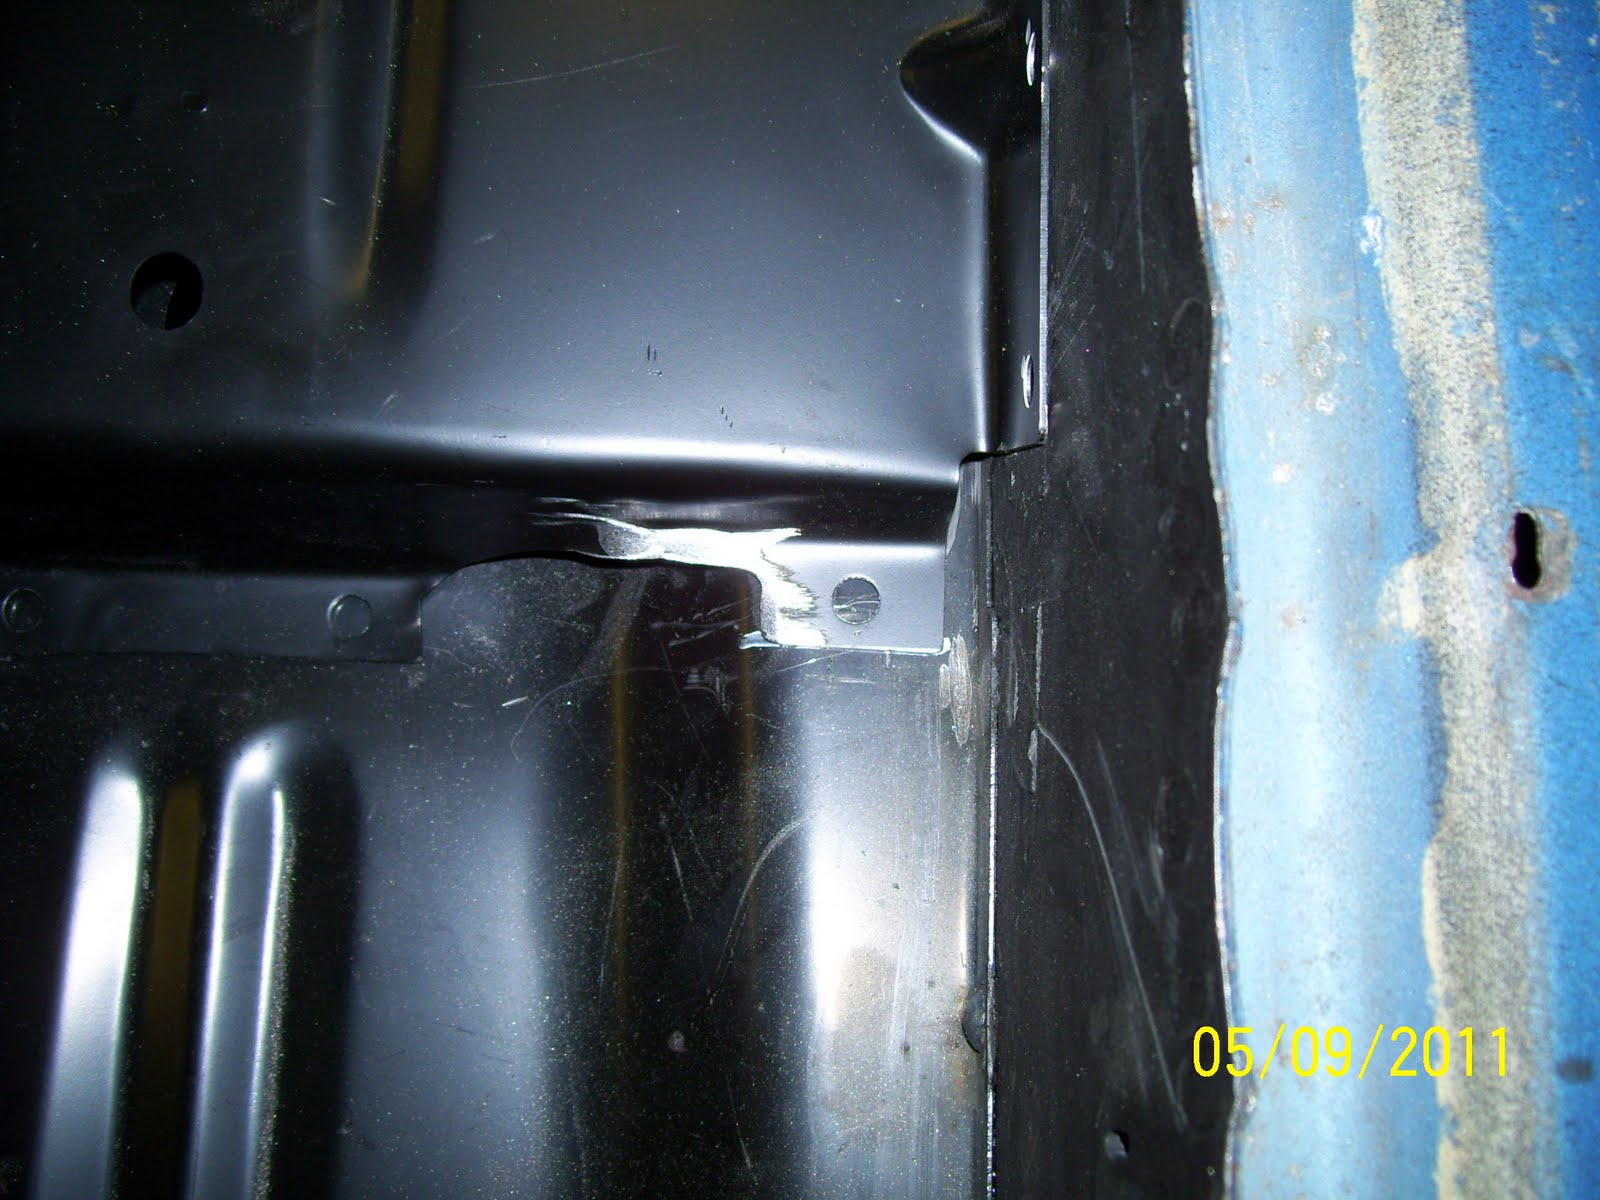
| After welding the seat pans in, I rolled the car over on the rotisserie to see that the bottom of the welds showed the tel-tale signs that the floor pan was indeed galvanized as advertised. |
 |
| After grinding the bottom of each weld with my angle grinder, I scuffed the surrounding area with a Scotch Bite pad and protected the bare metal surfaces with SEM high build primer. |
Subframe Connector Fitting
 |
| Before any fitting of the subframe connectors could happen, I needed to trim these small "wings" off the back of each front frame rail and dress the edges with the angle grinder. |
 |
| Here is a front frame rail ready for subframe test fitting. |
 |
| Using long drifts, I aligned the suspension mounting holes to make sure the connector would be positioned correctly for the test fit. With everything properly aligned, I clamped the rear mount in place. |
 |
| Much to my surprise, the front passenger side saddle fit absolutely perfectly right out of the box.! |
 |
| The driver side front saddle required slight modification to clear the stock e-brake cable bracket on the inboard side. Since I didn't want to cut the bracket out, I decided to modify the saddle to fit. |
 |
| I have marked the area that needs to be removed to allow a nice fit. Since the subframe connectors will be welded in, I had no concerns over loosing one of the bolt holes due to this modification. |
 |
| A little work with the abrasive cutoff wheel and a sanding disk and the driver side subframe connector fit perfectly as well. |
Firewall Repairs
 |
| With the majority of sheet metal damage remedied with careful use of a hammer and dolly earlier in the restoration, I cleaned the areas with a 50 grit sanding disk to prepare the metal for filler. |
 |
| The driver toe board repair area was also treated to the same grinding technique to prep for filler. |
 |
| ......same for the passenger side toe board repair area. |
 |
| I am a HUGE fan of Evercoat RAGE Gold body filler. I started using this product over a decade ago and it continues to impress. |
 |
| Mixing RAGE Gold couldn't be easier. a golf ball-sized dollop of filler on the mixing board and a stripe of blue cream hardener across the pile is all you need. Mixed thoroughly with a rigid spreader and you are ready to go. |
 |
| After the first layer is tacked up to an almost rubbery consistency, I trim the "fat" out of the filler with a small Surform tool (a.k.a. cheese grater file). |
 |
| After drying over night, I sanded the first layer smooth at all locations. Here is the driver side toe board repair area after first fill. |
 |
| Passenger side toe board repair after first fill. |
 |
| And finally the firewall/trans tunnel transition after first fill. |
 |
| After sanding the first coat of filler smooth, I use a #2 pencil to circle all of the areas that require filling on the second application. The second coat is always much thinner and more concentrated than the first and should only require minor leveling with the Surform. |
 |
| Here you can see the second coat is still wet and the area that is covered is much smaller than the first. |
 |
| After sanding the second coat smooth, I was very happy with the shape of the firewall area that was once so badly damaged by the clutch explosion. This area will be undetectable when the car is finally painted. |
 |
| Driver side toe board repair area is also nice and smooth. |
 |
| And the rather complex passenger side toe board repair area looks great too! |
 |
| Though the picture makes the repair areas look rather homely, the firewall is now quite nice and ready for a coat of primer/sealer. |


Man that's coming out really nice. Filler on the BOTTOM of the car! That there's the sign of an future show car. It's going to look awesome.
ReplyDeleteThanks! And actually, I doubt the car will ever see a show (kinda not my style) but I hope to drive the heck out of it and see LOTS of cruises.
ReplyDeleteSW, I was thinking of doing the same thing on my floors in the tranny tunnel to make them look nice. You must be a lot like me. No one else may ever notice or see those areas, but I know they're right. The sign of a true perfectionist car guy!
ReplyDeleteLOL! Dennis, you may be right. There will be A LOT on this car that nobody will ever see (unless they follow this blog of course), I will know where all the bodies are buried!
ReplyDeleteVery nice indeed! I have spent many hours/days/ weeks detailing areas that no one would ever see unless they saw my blog also. Nice work and great pics!
ReplyDeleteThanks James! I guess this little "hobby" of ours borders more on obsession.......
ReplyDelete