Well, this entry happens to be my first of 2012, but actually chronicles some of the last work I completed in 2011. To all who manage to slog through my missives on this blog, I appreciate your continued interest and wish all of you the very best in 2012! Happy New Year!
It has been a few weeks since my last update, and I have been quite busy with work on the car as well as several other “paying” jobs. I will be catching up on my blog entries to bring everything up to flush in the next few days. So let’s get started!
Having removed the rusty trunk floor bits and generally cleaning up the right rear trunk area, my first task was to set up my chelation rust removal “system” and remove the rust scale from the inside of the rear quarter panel before moving on to the actual repairs. Using the remainder of my supply of chelant, I applied the exact same technique I used previously to remove all of the rust from the repair areas on the right side. The scope of the job was nearly identical to the work required on the left side, so I knew in advance that about 10 hours’ worth of “soak” time would be required to complete the job. So with my setup in place, I let the process do its thing and the reward was another success. No more rust and a good, clean palette to work from.
 |
| Once again, I set up my chelation equipment and prepared to remove the rust scale from inside my right rear quarter. |
 |
| As the chelation process is started, you can clearly see the "clean" metal versus the rusty sections. This shot is the "zero-hour" mark for reference. |
 |
| One hour in and you can already see the edges of the rusted patches showing obvious signs of rust removal as indicated by the frosty grey color around the edges of the rusty areas. |
 |
| At about 3 hours, we are seeing some real progress on removing the rust scale. Also, you can see I wasn't able to cover the entire inside surface of the rear quarter, so I will have to do the rearward portion separately. |
 |
| Here we are at about 7 hours. |
 |
| After 10 hours of soak time, the rust is gone on the forward section and I moved my sprayer to the rear section to continue the process. |
 |
| I used a plastic trash bag as a splash shield to keep the spray directed into my recovery tray for recirculation. |
 |
| Ugly but effective. I used a few magnets along the bottom of the bag to keep it tight against the body and a clamp at the top. |
 |
| The rear section only took about 5 hours to clean. This shot shows the entire job complete with no evidence of rust remaining. |
 |
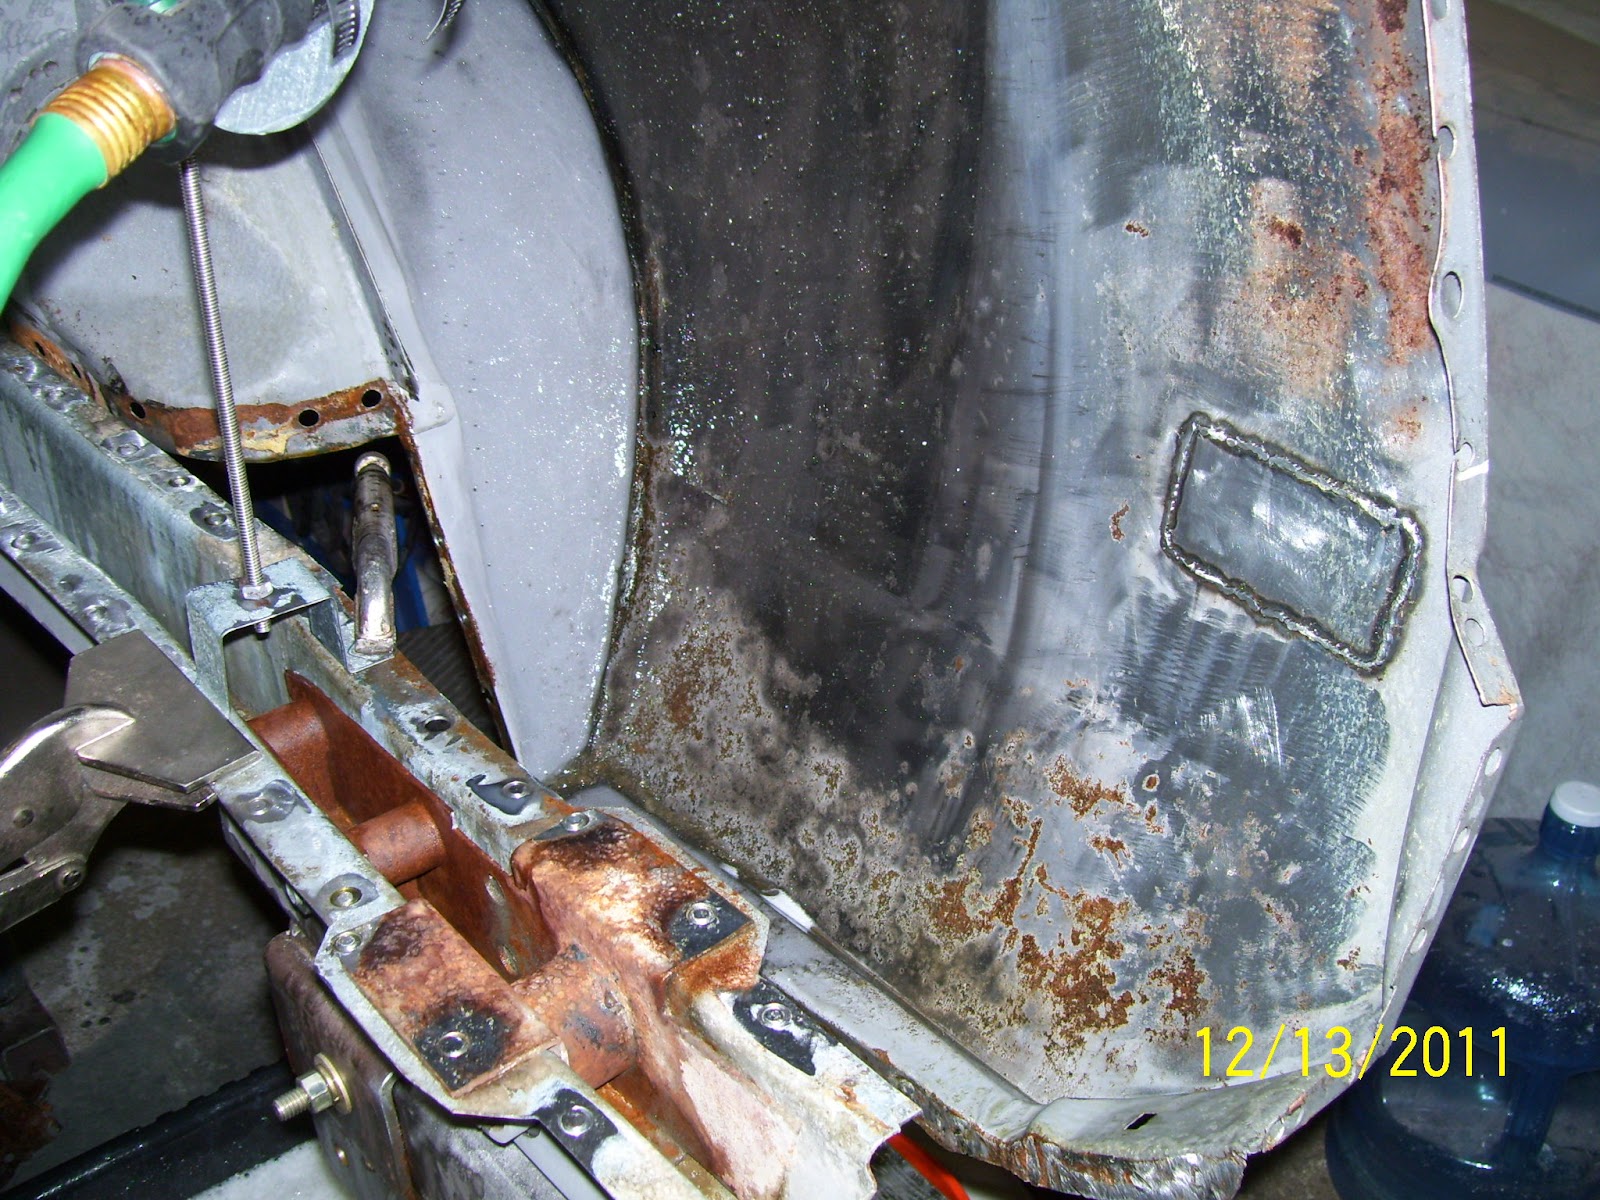
| Here is an up-close and personal shot of the area that was most heavily rusted. After a swabbing with grease remover, I treat the bare metal with phosphoric acid to prevent flash rust and etch the metal uniformly. Now we're ready for the next step! |
The end cap fitting was another familiar process and once again, I relied heavily on the body alignment holes to make absolutely sure the panel fit the rear quarter properly. Again I took my time and made sure the fit of every edge was as good and tight as I could make it before marking the locations of every plug weld with my white paint marker. This allowed me to sand away the paint from each weld location to ensure each weld would be as good as I could make it.
With all of the edges prepared, I fit the end cap into place one last time and carefully clamped the edges in as many places as I could to make sure everything stayed exactly where it belonged before tack welding the panel into place. Then, after a final check for fit, I welded the panel in completely and ground the welds smooth. As a final check, I bolted the quarter extension into place to check the contour of the fender to the extension. With only minor adjustments, the fit was nearly perfect and I could move on to the more challenging job of repairing the rusted rear wheel opening corner.
 |
| After aligning the end cap with long drifts in the locating holes, I clamped everything up to ensure a good fit. |
 |
| This corner is always a bit tricky to get nice and tight. But with a little work and clever clamping, it will snug up just right. |
 |
| I mark each weld spot with paint marker so I can carefully sand away the paint at each spot to bare metal for a good weld surface. |
 |
| Here's the bottom corner fit-up. Nice. |
 |
| Once I am absolutely sure I have everything fitting as best as it can, I go ahead and tack the panel in place. |
 |
| One last check for fit while everything is tacked confirms the panel fit is good and I can safely complete the welds around the entire end cap. |
 |
| All of the welding is complete in this shot and ready for grinding. |
 |
| With all of the welds finish ground, I could verify the fit of the fender extension was still as close to perfect as I could make it. |
 |
| Since these fender extensions are die cast pieces, they are excellent body contour references for fit. I am very happy with the fit after all of the reconstructive work on the rear of the quarter. |
 |
| Another view to confirm the fit is nice and tight. YES! |
As I mentioned in my earlier posts, the right rear wheel opening corner was more heavily damaged by rust than the left and I knew the repair would be more involved. Fortunately, I would be able to use the same repair techniques I used on the left side which limited the extent of metal replacement in the original quarter panel to just the rust repair area. As welcome as this condition was, it was not without its own surprises. Even though I was very careful to evaluate the extent of the rust damage and removed metal well outside the damaged area, I found that I ended up needing to repair a bit more extensively as I had originally thought. This presented some additional challenges that I needed to address as you will see in the pictures below.
One thing I feel compelled to mention, as I have on numerous occasions throughout this blog, is patch panel quality evaluation. In this case, I opted for another NPD repair panel which ended up being Canadian-made. On the counter, the lower quarter patch panel I purchased look “ok”, so I drug it home and put it in my stock of parts until such time as it would be needed. When the time came to use it, I started to notice many undesirable characteristics that would be rather significant IF I had chosen to use the panel as a whole. By sheer luck alone, I was able to avoid having to do so and would only have to use the panel to provide two small patches. Specifically, there was not a single stamped character line that was correctly defined on the panel and the rear bumper coves were quite simply wrong in every aspect. In fact, save for the front few inches of the panel that I used to fabricate my patches, the panel was otherwise garbage. In fact, the only saving grace was perhaps that it was made of decent metal and of the proper gauge. Otherwise……..pure crap.
On the flip side, the outer wheel house panel that I picked up from NPD and used to donate the repair patch for the rusted section of the original panel was actually fairly decent. Not perfect by a significant margin, but more than good enough for the area that I required for the repair.
So that catches us up to about the last week in December and sets the stage for the actual trunk floor installation and panhard rod mount installation, which will complete the chassis-side of the Heidts 4-link suspension installation.
 |
| See those two little spots that look like a snake bite circled in yellow at the top of the picture? Well, they proved to be exactly that and bit me square in the butt as I started the rust repair. You can see that the inner wheel house damage appears to be contained to the patch area I cut out, but as it turns out, there was a small, hidden area just under the "snake bite" that was rusted as well. Crap! |
 |
| This shot is ugly, but educational. Notice how the chelation process cleaned the rust from the damaged area, but also notice how Ford's factory seam sealer actually promotes rust between the flanges as much as anything! |
 |
| Here, I have already installed the wheel housing patch and tacked in the outer wheel opening patches. |
 |
| Notice the small added patch above the large patch. This is the area with the two "snake bite" holes I had to repair unexpectedly. |
 |
| I am about 2/3 of the way through welding the patches in place. Notice the short welds with minimal heat affected zone. This is about as good as it gets with MIG welding. Ideally, this would be a TIG job, but I don't yet have a TIG machine. YET being the key word. |
 |
| With the welds ground flush and the area scrubbed with a metal conditioning disc, the repair is complete. |
 |
| Here's another look at the finished repair from the wheel opening side. |
 |
| And finally, the repaired area from the inside. Note the weld penetration on every seam. This repair should last a lifetime. |


Sven,
ReplyDeleteYou've made me a chelation convert. Makes me want to pull the car back apart and start over. I remember numerous times when I just wasn't happy with the rust removal process but had no other weapons left to try. This is especially good for those cracks and crevices that are difficult to reach by mechanical means. As always, beautiful work. Anxious to see the panhard rod installation. BTW, do you have copies of 2 small manuals titled Boss 302 Chassis and Engine Modifications? I picked them up years ago while on business in San Fran. Visited Maier Racing to pick up some Cleveland valves and saw these sitting on the counter. Couldn't resist just for the historical significance. They detail factory Autolite upgrades for the Bosses. Very cool!
That chelation process just looks like magic. I wouldn't have believed it if you hadn't shown it to us. Your patch and panel work is excellent. Looking forward to the follow-up posts. Have a great year Sven!
ReplyDeleteRJ,
ReplyDeleteChelation is definitely one of those "black magic" processes that you kinda have to see and experience to believe. But it does work and certainly has it's place in our world(s).
As for the manuals, I have been fortunate to have had these manuals as long as I've owned my car. They have become a bit of a "must have" for Boss owners over the years and a great references. Have a great 2012!
Alex,
ReplyDeleteThanks for the props! If you ever decide to try the chelation process, feel free to throw any questions you have my way. It is definitely useful and works well. All the best to you in 2012 as well!
Sven,
ReplyDeleteYou are the master of body restoration! I've learned so much from you and didn't have to go through all the trial-and-error work that you did. Excellent work!
Dennis,
ReplyDeleteWhat a generous thing to say and thank you very much. It truly makes my day to learn that something I share on this blog proves helpful to someone else trying to keep the automotive dream alive. I'm honored you find value in my work.
I stumbled on your Blog while looking for some rust photos for reference, nice job on the photos and I am wondering if you could give some more specifics on the "chelant"? and the process you used.
ReplyDeleteIs that a sump pump in a tub?
Where can the chelant be purchased and under what name does this product go by?
Thanks
Thanks for the comment and I'm glad you found the chelation information of interest. I use a simple submersible sump pump to circulate chelant when I need to. To help you better understand the process and the sources I use, I have attached the two original entries I wrote that document more extensively my work with the chelation process. I think these two articles will answer all of your immediate questions, but if not, please feel free to ask for additional detail!
Deletehttp://1970boss302.blogspot.com/2011_06_01_archive.html
http://1970boss302.blogspot.com/2011/11/thinking-outside-rusty-box-part-2.html
Very interesting, thanks for the info, I played around a little with a product called Evap-Rust which I assume to be the same but other than soaking parts I to was trying to think of a way to work with larger panels and I definitely think you are on the right track.
ReplyDeleteI hope you don't mind but I shared your story on our company Facebook page, you can find it here https://www.facebook.com/forrestautobodyelgin
Awesome work! Did I miss where you identified the primary ingredient in these solutions? You dropped from diluted to concentrate re-packaged solution, and now we need to find the path directly to the chemical suppliers. ;-)
ReplyDeleteThanks! In my first two chelation articles in this blog, I identified the two suppliers of concentrate I used. I use the Esprit product still today, and there are others in the market now as well. I am not sure what the "core" chemical source may be and haven't had the time to chase that detail, but there is surely a "bulk" source out there!
Delete