Today was a GOOD day! When the fall and winter season began, I had a pretty tight plan on what I thought I could accomplish before the Spring and I am very happy to report, that it appears that plan will work to perfection. With the installation of the rear tail light panel, I am happy to say the major structural repairs to my car are complete. I still have to complete the welding on the axle tunnel repair panel seams and get the new panels in primer, but at least I have the comfort in knowing the car is structurally sound once again.
Several weeks ago, my Dad and I raided my local NPD for a truckload (literally) of sheet metal that included a new tail light panel and trunk lock support bracket to complete my panel replacement at the rear of the car. The tail light panel was a very nicely detailed stamping that fit the car quite well. The trunk latch support on the other hand was less so and required a bit more tweaking to get in order. Nothing major, just tweaking.
I started the installation by carefully centering and squaring the new trunk lock support on the inboard tail light panel. I have seen a lot of variability in the location of these brackets over the years, but it is critical that this be well centered so that the trunk lock mechanism works smoothly and the fuel filler tube passes through without interference, so take your time and get this right.
With the lock support welded in, I was finally to the point I could start the final fit of the tail light panel. The first thing I did was to establish the center of the rear trunk floor aperture and I did the same on the tail light panel lower interior flange. I reasoned that if my preparatory work was accurate, these two lines would line up when the panel was in its optimum position. This idea was a good one as alignment was easily verified with these reference points and positional repeatability was spot-on.
The first observation during the panel mock-up was that both quarter panel end cap flanges overlapped the upper raised panel bead on the tail light panel significantly. This prevented the panel from seating on its end-flanges properly and generally looked unfinished. So out came my trusty paint pen and straight edge and I marked the appropriate trim lines that would allow the panels to mate correctly.
With the end cap flanges trimmed, the panel fit amazingly well. This allowed me to install Clecos in the four corners with confidence and clamp the flanges with welding clamps such that I could accurately locate the spot weld locations around the panel. Once this operation was complete, I punched the required plug weld holes with my pneumatic punch and drilled the few remaining holes I couldn’t reach with the punch. After a little deburring of the drilled holes, I fit the panel once again to verify everything was looking flight-ready.
The actual welding of the panel went smooth and without drama. I started by locking down the corners where I had the clamps located and then moved around the panel, welding the spots between the clamps to ensure tight flange fit and little distortion. After about an hour of welding and cooling each spot with air, the panel was fully installed and the chassis was solid once again.
I still need to weld in the bumper brackets, complete the axle tunnel welds, trim the drip edge at the front edge of the trunk floor, and prime the whole area, but those are small jobs that will be made much easier now that the car can be rolled over in the rotisserie again without concern for the integrity of the structure. It was a very good day…….
 |
| The tail light panel; installation was preceded by having to align and weld in the trunk latch support to the panel. This is much easier than trying to do this with the panel tacked into the car. |
 |
| The first mock-up of the tail light panel shows the fit was remarkably good. Only slight tweaks would be required to get it right. |
 |
| I was amazed at the fit at the lower rear of the trunk floor in the unclamped state! Couldn't ask for better. |
 |
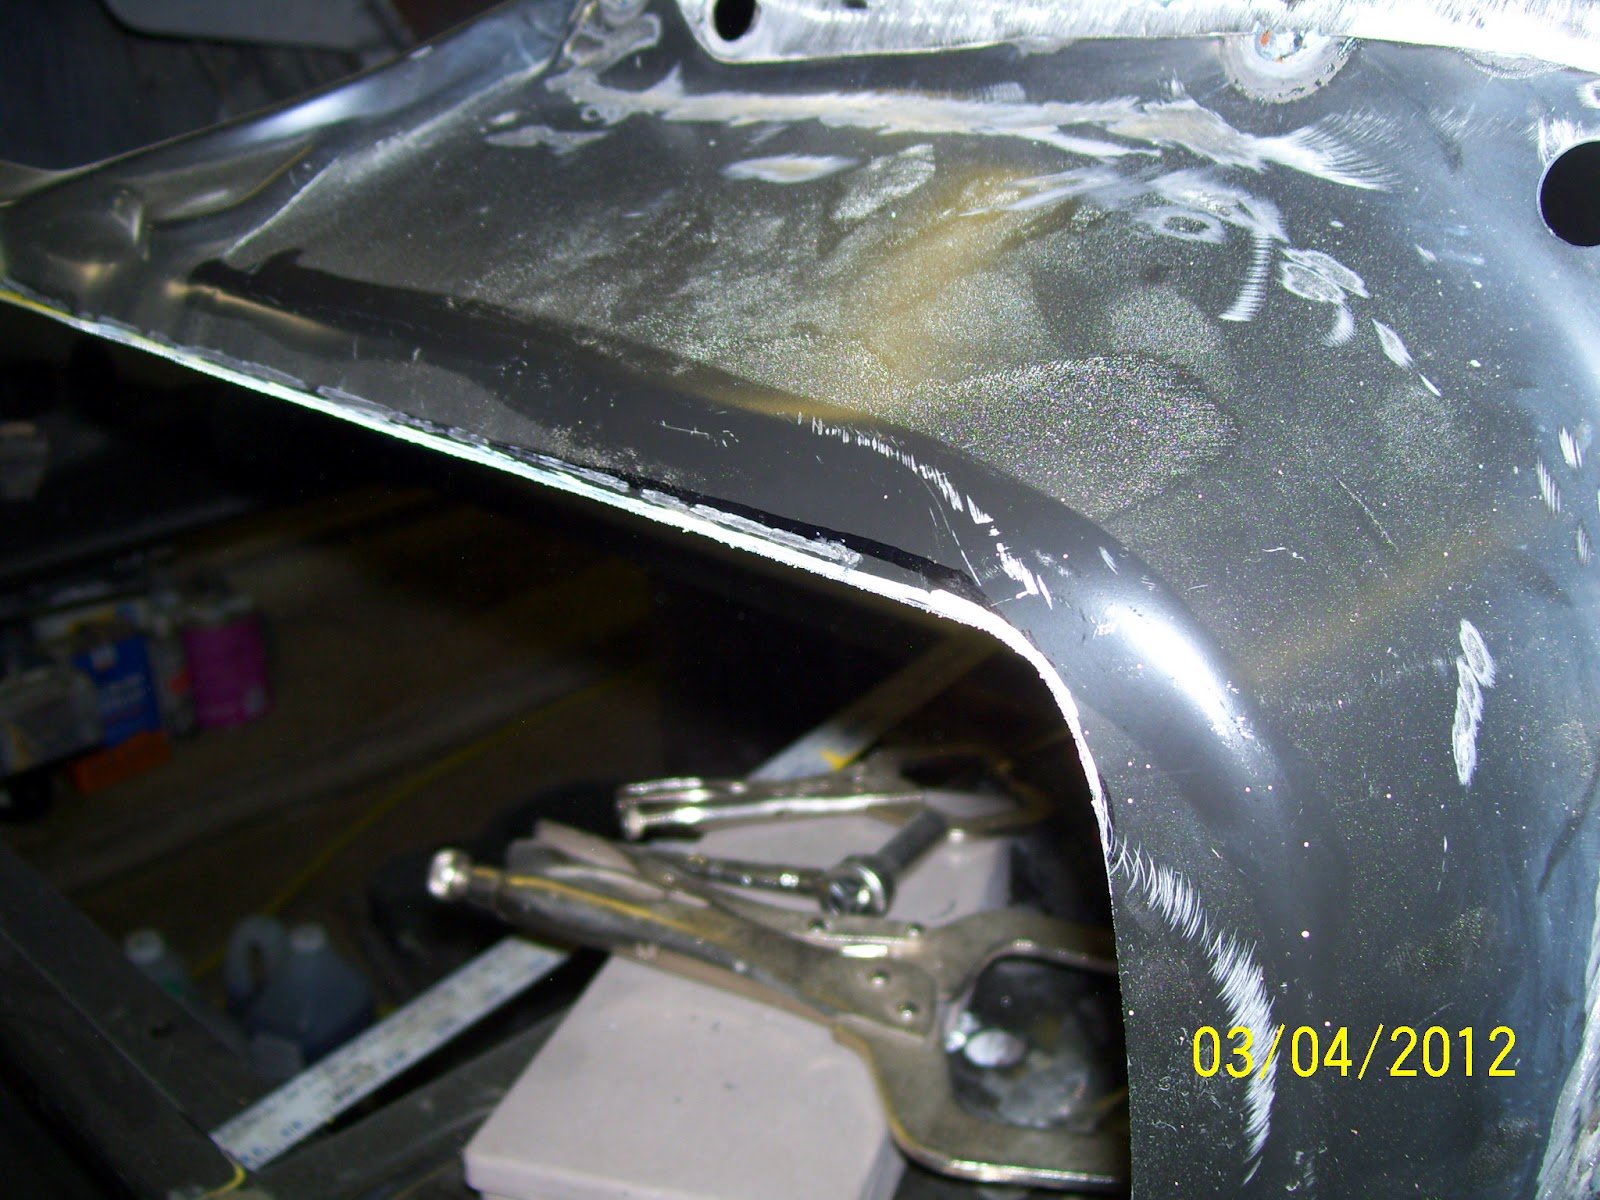
| Here, you can see the overlap of the end cap over the upper character bead on the tail light panel. This wouldn't allow the panel to register fully against the end cap flange as evidenced by the gap in the upper corner of the end cap. This will need to be trimmed and hand fit to work properly. |
 |
| Exact same overlap condition existed on the right side of the tail light panel as well. |
 |
| Using my trusty paint marker and a straight edge, I marked the end cap flange where I needed to trim it back to fit. |
 |
| Here is the right side marked for trimming as well. |
 |
| With the tail light panel removed it is much easier to see the extent of trimming required on the left end cap flange. |
 |
| The right side end cap flange required just a little bit more trimming for proper fit. |
 |
| Left side end cap is trimmed and ready to go! |
 |
| Right side end cap also ready. |
 |
| Now you can see how consistent the panel bead reveal is and the corner fit is much tighter. |
 |
| Right side fit is also very nice. |
 |
| After marking and punching the spot weld holes in the end cap flanges, I clamped the tail light panel in place and located it with Clecos |
 |
| This is a slightly better shot of how I mark the weld location on the tail light panel flange for sanding later. |
 |
| Welded! This panel went in like butter and the flange fits were superb! |
 |
| Right side shot of the panel welded into place. |
 |
| A shot along the bottom edge of the tail light panel flange. |
 |
| Left side end cap area after a bit of metal finishing. |
 |
| Right side end cap area after metal finishing. |
 |
| Only a spot of high-build primer will be required to smooth this flange area. |
 |
| After welding, the trunk floor to tail light panel interface still looks tight and right. |
 |
| Another shot down the lower flange to show how straight everything turned out. |
 |
| I just HAD to throw the end caps, trunk lid and some old tail light bezels in place to see how it looked! Awesome! |
 |
| It's been a LONG time since this 'ol girl looked so "complete" in the posterior. A good day indeed! |


Beautiful Sven - if the day was anything like the one here in Pittsburgh - you picked a good one! Won't be long until she's all in primer.
ReplyDeleterj
Thanks RJ! I am hoping to have the car in primer by Fall with the bottom complete and possibly the engine bay in color. Probably wishful thinking but I have a plan!
DeleteBetween you and Alex I am getting so jealous... I have a couple of small updates to make on my blog but I wish I was up to the same as you lot!!!
DeleteHaven't checked in for a while so there are some big differences. Still got a bit of catching up to do on your blogs but it just looks superb! Well done.
Thanks Mike and welcome back! Thought for a tick that we might have to send someone over there to check in on you!
DeleteExcellent job on the fit and finish...as is usual Sven fashion!
ReplyDeleteThanks Dennis! How are you liking having your car on the rotisserie? Ain't that the best thing since pants with pockets?
DeleteBeautiful work Sven, simply beautiful. You almost make me want to do some more sheet metal work on my car.... almost. :-)
ReplyDeleteThanks Alex! And I know for a FACT that warm weather you've had out there the last few days hasn't got you THAT crazy from the heat! LOL!
ReplyDeleteIt's coming along nicely. Nice spot welds.
ReplyDeleteThank you very much and congratulations on hitting the street in your '66! Awesome!
ReplyDelete