With my recent rotisserie modifications complete, I was able to put a lot of work into the Boss these past few weeks that would have otherwise been impossible. Now that I was back on track, I felt good about the prospect of getting the trunk floor one step closer to complete by installing the rear trunk floor/lower tail light panel support.
Out of the box, this panel actually fit pretty well, with only slight adjustment to the end flanges required to get the panel fitting nice and tight against the inboard trunk drops. Once I had the fit acceptable, I drilled plug weld holes in the flanges and set off to check the final fit with my old gas tank in place as a fitment guide for the mounting hole alignment. This proved to be another example of why you shouldn’t throw anything away during a restoration. Even though my old fuel tank is worthless in the long run, it was a great fixture to help align the mounting holes in the panels before welding.
I started by using some small machine screws to secure the tank to the outboard flanges in the same locations as the tank mounting screws would go. Then I fit the rear trunk floor panel in place and used two tapered drifts to align the rear tank locating holes and then clamped the works into place. I then verified the fit by making sure the rear tank mounting screw holes lined up perfectly. Satisfied I had the panel fitting well; I outlined each flange with my yellow paint pen to give me reference marks to verify the fit once I was ready to weld everything in permanently. At the same time, I marked my left and right trunk floor flanges so I could punch plug weld holes in the proper locations along the edge along with the rear frame rail horns which required drilled plug weld holes. A few minutes of work with the pneumatic punch and step drill and a swipe or two with the angle grinder to clean up the holes and the panel was ready for installation.
Using my trusty welding clamps, I clamped the panel into place in as many places as I could to ensure a tight fit at every flange location before any welding was done. With each seam tight, I started by welding along the top flanges of the outboard floors, skipping from the left side to the right to reduce the chances of warping. From there, I moved to the inside rear flanges using the same technique.
At this point, the rear of the panel was nice and tight against the rear frame horns, so I welded each horn completely before moving to the outboard ends of the panel to complete the welding operation. After a few more minutes with the angle grinder, the welds were smoothed up and the job was complete. Next stop: Front trunk floor!
 |
| Lesson learned: Don't throw anything away! My old fuel tank came in very handy in positioning the rear trunk floor panel to make sure the mounting hole alignment was spot-on. |
 |
| I sued a couple of machine screws in each mounting screw hole to position the tank properly before fitting the repair panel. |
 |
| Using a pair of tapered drifts to align the rear trunk floor panel, I clamped the work in place using my trusty welding clamps and checked the fit. |
 |
| This is what you want to see when trial fitting a new panel. Perfect mounting hole alignment. |
 |
| While everything was clamped together and fitting nicely, I traced around the edges of the panel to help when repositioning the panel for welding. At the same time, I marked the locations of each plug weld to help me punch or drill th holes required. |
 |
| Here's a shot of the welds along the rear edge of the left trunk floor. |
 |
| And here's a look at the welds along the right rear trunk floor edge. |
 |
| The panel fit quite well right out of the box as evidenced by the nice tight fit on the inside of the left rear trunk floor interface. |
 |
| The inside right rear trunk floor also fit remarkably well. |
 |
| With the upper part of the trunk floor edges welded in, the rear frame rail stubs could be buttoned up. |
 |
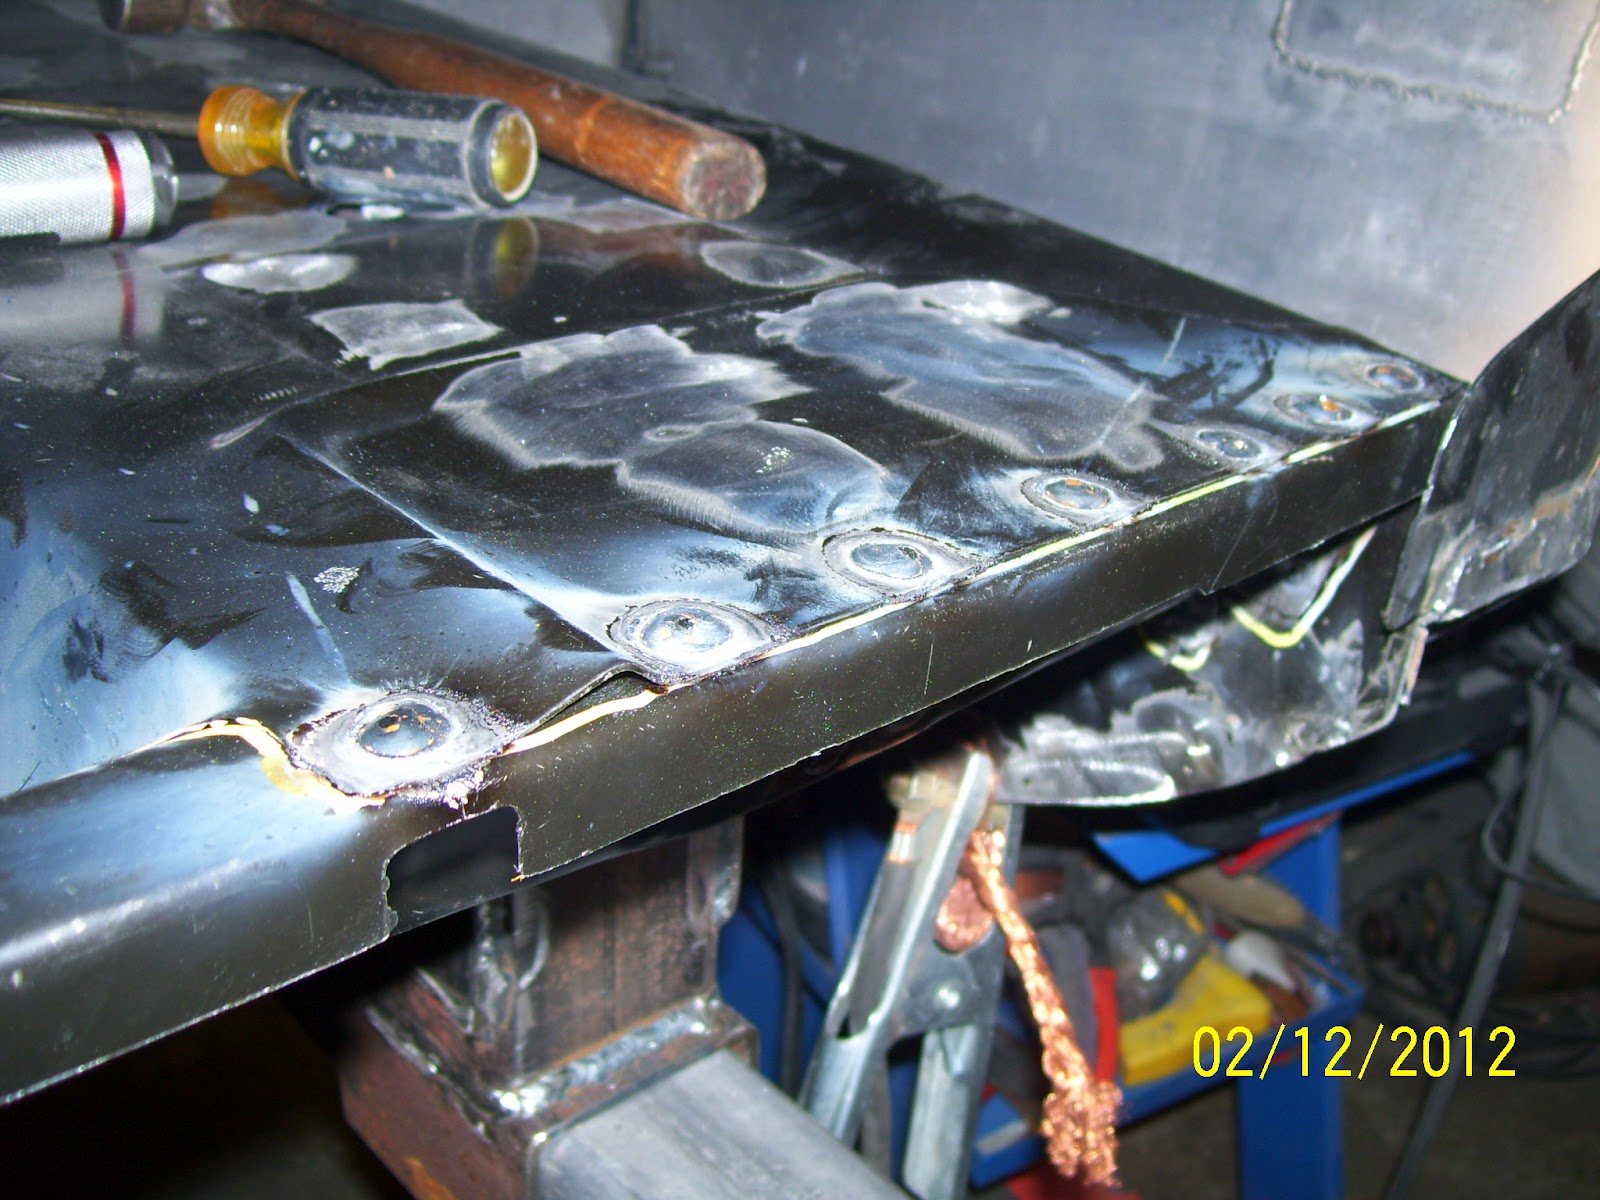
| Here, the end flanges on the right side have been welded up. |
 |
| In this shot, you can see bothe the end flanges and frame stub welds. It's in! |
 |
| With the welds ground smooth with the angle grinder, things are looking quite nifty. |
 |
| The left rear trunk floor area after smoothing up the welds. |
 |
| Another shot of the lower left rear trunk floor after weld grinding. |


No comments:
Post a Comment