Quite a while ago, I posted a blog entry railing on the total lack of quality of every single front trunk floor patch available today along with the work I had to do to get the panel to fit correctly. At long last, I have reached the point where the last heavily rusted panel I had could now be replaced. And MAN does it feel good!
This repair will feature a panel joint repair that I use rarely, but works very well in certain situations. The joint is called a lap joint and it is very useful on panels where the span is long and there is no feature(s) in the panel to add strength and resist warping. In my case, the entire width of the front trunk floor repair was of this configuration and determined I could not adequately butt weld the entire joint with hope of success.
I began by trimming the floor repair panel to the basic dimensions I required to make the repair. I had marked the location of the repair several months ago with a white paint pen to remind me of where I wanted to join the repair panel to the parent metal when the time came to make the repair. By transferring a few dimensions to my repair panel, I was able to get the seam located where I wanted it. I added ½” to the dimensions so I had enough material on the repair panel to allow a flange to be created.
With the panel trimmed, I then used my pneumatic flanging tool to flange the entire top edge of the panel to allow the parent metal to neatly fit underneath the panel flange. This creates a surface on the “finished” (a.k.a. bottom) side of the axle tunnel that can be made smooth and straight with minimal filler once all of the welding is complete. Also, the lap joint it creates on the bottom is much easier to weld cleanly and without burn-through than a conventional butt weld joint.
Next, I used the repair panel as a marking template to locate the cut line for the parent metal ½” below the top edge of the repair panel flange. Using my trusty screaming-wheel-of death (a.k.a. pneumatic cutoff wheel), I cut off the rust-damaged portion of the original front trunk floor and deburred the edges.
At this point, I spent a good bit of time carefully clamping the repair panel and parent metal to ensure the fit between the two was a good as I could make it. Once I was satisfied with the fit, I locked the panel in place using my high-clamp-force Cleco fasteners. Another check of each seam to verify fit and it was game time!
I wanted to be able to flatten the welds a bit over regular plug welding so I ran the heat and wire speed up just a tick on the MIG welder. This game me a quick arc start and smooth metal deposition that I would not have been able to use with a butt weld. This technique worked great and I stitched the panel in place quite quickly. While I was there, I also welded up a number of spots along the top of the axle tunnel that I had marked several months ago. Once the stitch welds were complete, I checked the fit from underneath and was pleased that the flange fit was good and warpage was minimal. A little bit of hammer and dolly work had the parent metal flange seated tightly in the recess of the repair panel flange. This edge is now ready for a fully seam weld from the underside to complete the installation. This step will have to wait until the tail light panel is installed and the car can be rolled over in the rotisserie without concern for the body inadvertently shifting without a complete structure to support it. In the meantime, the panel won’t be going anywhere.
The last area that required repair in the front trunk area is the aperture where the factory cut out the axle tunnel for the staggered shock mount to pass through. In an earlier post, I showed how crudely the factory had cut this opening using a torch and apparently not much skill or precision. Naturally, this area would require a bit of clean-up before I could make a patch to repair this area, so I traced the opening with trim lines that would allow me to square the hole before going any further with patch fabrication. With the hole trimmed to the lines, I was able to trace the hole on a piece of cardboard. I added a ½” border flange around the hole traced on the pattern and transferred this shape to piece of .025” steel patch material and cut the patch on my band saw.
Moving to my flanging tool, I once again flanged the patch along three of the four sides, leaving the lower edge of the patch flat to allow it to tuck underneath the previously installed trunk floor patch. Next, I took my contour gage and made patterns of each end of the patch are so I could carefully form the patch to match the shape of the axle tunnel. When I had the shape correct, I secured the patch with Clecos and tacked/stitched the patch in place in the same manner I did with the larger trunk floor panel. Once all the top-side welding was complete, I smoothed up the welds with my angle grinder and some 60-grit disks and this phase of the trunk floor repair was complete.
From the bottom of the axle tunnel, the repair is quite smooth, and after a little bit of body work and filling, it should be virtually undetectable. There’s a good bit of welding left to do to finish the joint, but that will have to wait until the tail light panel is installed so I can once again roll the car over on the rotisserie.
 |
| My pneumatic flanging tool made forming this step flange along the edge of the front trunk floor repair panel a quick and tidy job. |
 |
| After trimming the repair panel to the length I needed and flanging the leading (top) edge, I marked the parent metal with my yellow paint marker to establish a reference line to work from so I could mark the cut line on the parent metal. |
 |
| From the reference line I marked in the previous step, I dropped down 1/2" and marked the cut line of the original metal. |
 |
| My original white sketch line can be seen right between the upper reference line an the lower cut line. Also in this shot, you can see the locations of the small areas I need to weld up (shown as white squares). |
 |
| Using my cutoff wheel, I carefully cut the rusty lower section off the car, leaving a clean edge, ready for the new panel to be clamped to. |
 |
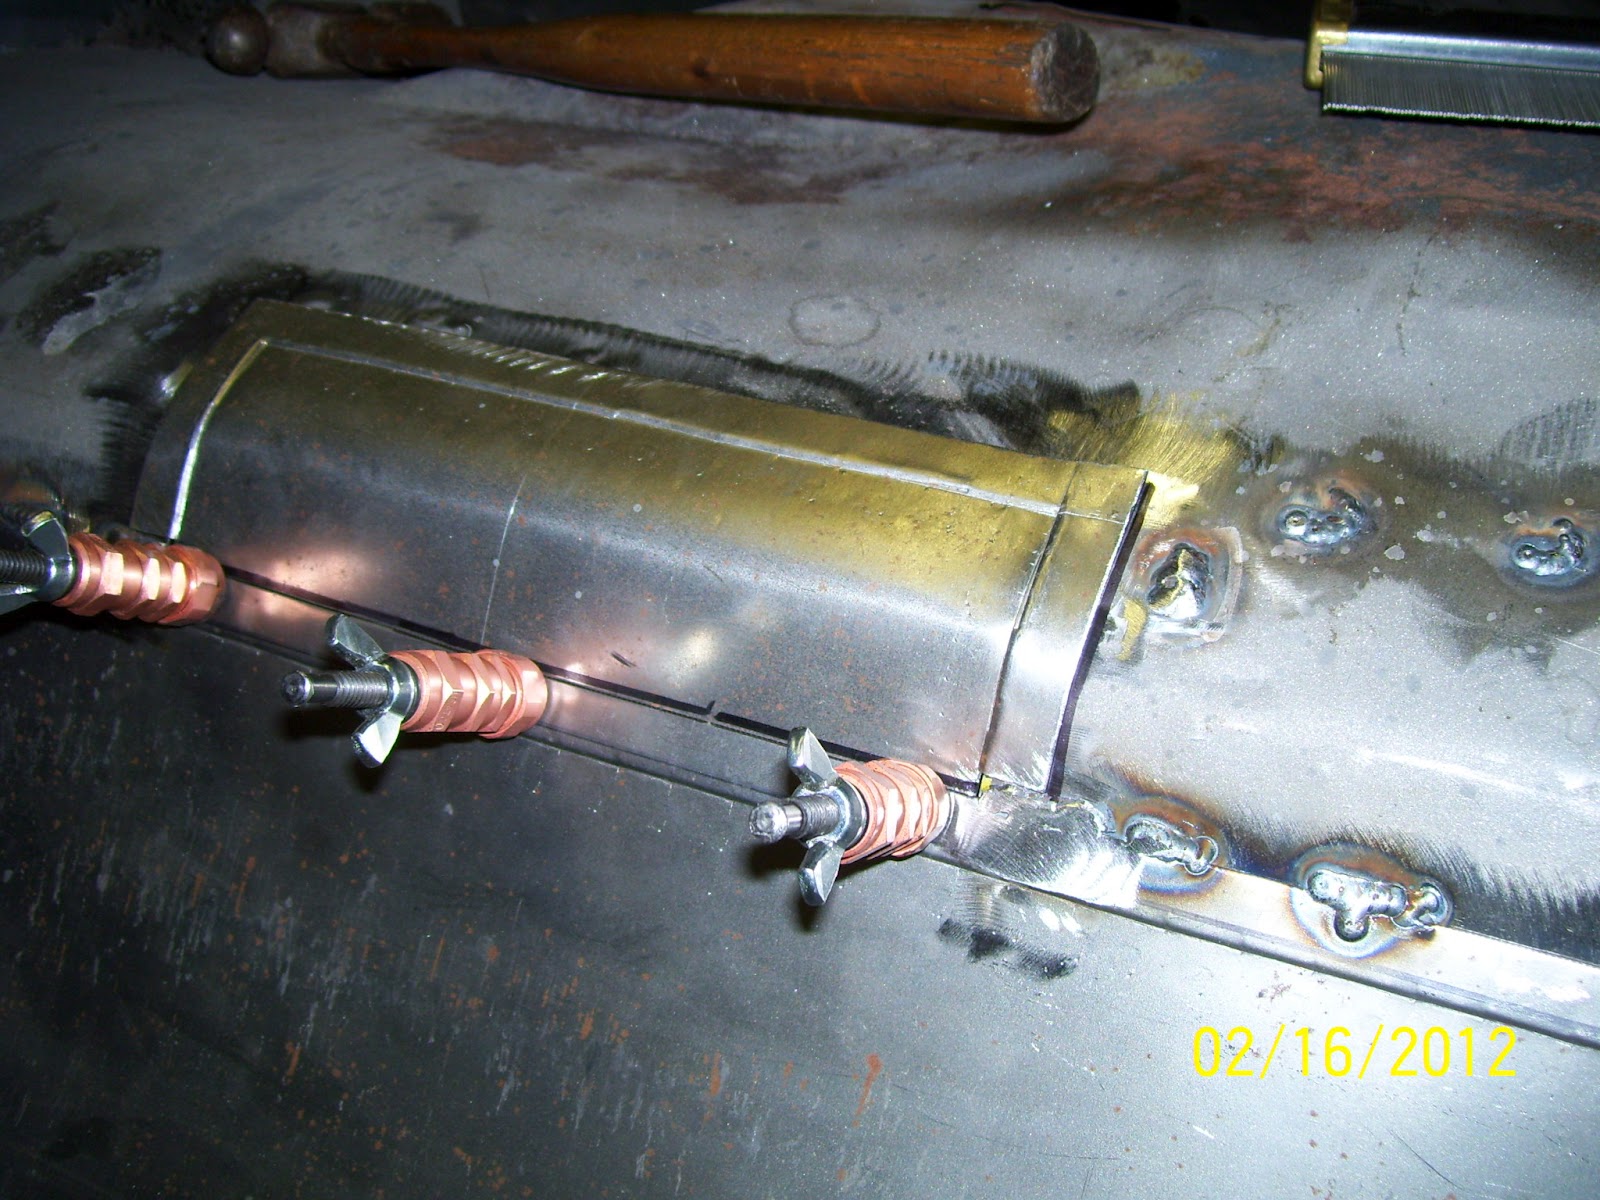
| The repair panel was then secured using high-clamp-force Cleco fasteners. |
 |
| Here's a close-up of the left side of the trunk repair panel clamped into place. |
 |
| A quick check from underneath shows the joint edge is nice and flat and ready to be tacked/stitched in place. |
 |
| A few minutes later, and the panel is securely stitched into place about every 2.5 to 3" along each edge. Notice the minimal heat affected zone around each weld. |
 |
| Here's a look at the right side of the front trunk floor repair after tacking in. |
 |
| Another shot from underneath shows a clean, straight edge that is ready for complete welding. |
 |
| The remaining issue in this area was the hole the factory cut for the staggered shock mount to pass through. This hole was quite nasty, so I decided to trim up the edges so I could create a nice clean aperture to fit a patch to. |
 |
| Here, I have cleaned up the hole into something i can work with. |
 |
| I made a simple cardboard pattern by tracing around the hole and adding the requisite 1/2" flange allowance around the perimeter. |
 |
| After cutting out the patch blank on my band saw, I flanged the side and top edges of the patch. This would allow the lower edge to slip behind the trunk floor repair panel to match the parent metal flange. |
 |
| I used some simple cardboard templates I made for each end of the repair area to duplicate the shape of the floor at each end. This allowed me to for the patch to precisely fit the hole. |
 |
| Here you can see the tight fit against the original Axle tunnel I needed to ensure the patch panel fit as required. I clamped the lower edge of the patch with Clecos to help make sure the patch was located precisely while fitting. |
 |
| Here is the view of the finished patch panel from under the car. You can see how nicely the patch integrates into the trunk floor repair panel and the parent metal area above it. These flange joints will make fully welding in the repairs much easier by reducing the tendency to burn through significantly. Also, the warpage is considerably less with this style of repair joint. |
 |
| Clamped into place, the patch is ready to be tacked in. |
 |
| The patch panel has now been fully tacked into place and looks excellent. I also welded up the spots along the top of the tunnel as well. |
 |
| From underneath, you can see the repairs are smooth and the seams quite straight. I will fully weld each seam after the rear tail light panel is in place so I don't have to worry about the body shifting on the rotisserie. |
 |
| Done! A few minutes with the angle grinder and the top side of this repair is complete. |


No comments:
Post a Comment